Showing posts with label foiling. Show all posts

Monday, 3 October 2016

Even more foiling awesomeness! Foiling die cut images (No toner paper required!)


Hello my friends!  I am back with some more foiling awesomeness!  This is just a quick post that is kind of a take-off from my previous foiling posts Part 1 and Part 2  using one of the techniques I was experimenting with.

It is very easy to foil die cut images without having to get any toner paper, use a laser printer or a photocopier.  No toner required!  Using a product that most crafters have on hand, Mod Podge, we can create our own reactive paper or card.  You could also use some of the other mediums that I tested in the other foiling post, but today, I used Mod Podge.  I will probably do some more experimenting to determine which I feel gives the best result, but they should all work.


All you have to do is cover some cardstock or paper with the Mod Podge,  Take an extra minute when you do this to ensue that you have a nice even and complete coverage.  I rushed it a bit and you can see the brush strokes in some areas and there were a couple of pinhole spots that I guess I didn't completely cover.  Admittedly, it will not be as completely smooth as a toner sheet, but it's pretty good and personally, I don't mind a bit of texture. Let it dry and die cut your images from the prepared card/paper.

Once you have your die cut piece, (the mod podge side must be the top), lay your foil over it, shiny side up, and run it through you laminator or Minc.. Make sure you don't have any mod podge on the back or it will stick to your carrier.


I painted several sheets at once with the Mod Podge so that I will have some on hand and won't have to do that step and wait for it to dry each time.
I also wanted to take this opportunity to mention something else that has come to my attention.  My friend, Mary, was using a heavier card and was having some difficulty getting the foiling to work with her laminator.  Possibly with the thickness of the card and the copy paper carrier, the foil wasn't getting hot enough.  Mary used tissue paper as her carrier, instead of copy paper and it worked.  So if you are having a similar problem, you may may also find that tissue paper is a good solution as well.  Thanks Mary!

And thank you for taking the time to visit!  I hope you found this little tip helpful.  Please share it with anyone that you think may want to give it a try.  
Have an awesome and artful day!

Friday, 5 August 2016

More Foiling Awesomeness!


Hello my friends!  Are you a fan of foiling?  Do you love that shiny goodness?  If you do, you will be interested in this post.
I was watching videos on You Tube the other night and I ran across one that mentioned foiling.  I am always looking for new foiling techniques, so I was anxious to watch it  And I am glad that I did.  Just for the record, in case you ever visit my post and read this, Kate Palmer, it is your fault that I went to bed so late last night!  But all for a good reason!  Kate was doing some experimenting with some Heidi Swapp mediums.  I didn't realize that now there is a foil reactive paint and a reactive spray.  She was testing how these mediums worked with foiling over some sprayed backgrounds.  Here is a link to Kate's video She referred to watching some videos by Heidi Swapp and discovering that the Heidi Swapp metallic embossing paste and her metallic screen ink were also reactive with foil.  I don't know why it never occurred to me to subscribe to Heidi Swapp's channel to get info on foiling, but I have corrected that now.  You don't have to own a Minc to get some useful information, it all works with a laminator  as well, which is what I have.  I didn't have the spray or reactive paint, but I did have the embossing paste and I also had the screen ink, purely by accident.  I thought I was buying embossing paste and later realized that the great deal I had gotten was for screen ink NOT embossing paste, lol.  I had resolved to use it in a similar fashion as the paste, but this was great news if I could use it for foiling. The gold ink and paste were specified, which I didn't have, but I thought I'd give what I had, a try.. Who needs sleep anyways?  My mind got going and I thought, I wonder if any  paste would work, I do have other gold embossing pastes, so I thought I'd try those as well.  Then I thought I'd try some gloss medium, too.


I had some Gelli prints that I had cut down to try and make some ATCs, so I thought I would use them to test the various inks and pastes.  I ran the various mediums through a Tim Holtz burlap stencil


I got out my laminator and my foiling scraps once they were all absolutely dry.  I just use a folded piece of copy paper as a carrier.  I started feeding them through the laminator.


I was so thrilled to discover that everything I tested, worked!  The gel and the embossing paste seemed to work a little better than the screen ink, but I will still be using the ink for foiling, too.  This just opened a new foiling world for me! 

I used Heidi Swapp embossing paste through a stencil on my tag today, and it worked beautifully


 I have been doing some experimenting with toner to try and make something like a toner paint  and ink, with some success,  but now this may take me in a different direction.   I am wondering if I actually need toner. at all .   So I have some more ideas and experimenting to do!.  In the meantime though, I thought I would try  using some other pastes and mediums  So stay tuned, and tomorrow I will share the results of the other products I am trying to see if they are also reactive with foil. .  I am an artist that loves to paint wit a lot of texture, so I have several different pastes and mediums to try.   Hopefully, there may be something that you already have on hand that will work for you

Thanks so much for letting me share some foiling fun with you.  If you think there may be other foiling fans that will find this useful, please share! 
Thanks again and have an awesome and artful day!

If you enjoy foiling, be sure to check out some of my other foiling posts!

Tag # 8-1 "Transform" #onelittletag (with a little foiling!)


Hello my friends!  Well, tonight I made a tag for the One Little Tag Craft Challenge. The prompt is to use sprays and stencils.  I wasn't going to worry about the prompts for the time being, but this was one I liked!  So this tag was created using a background made during my play with sprays and stencils.  I also used a new foiling technique (which I will be posting!) and punched a butterfly out of gold foil card.  As usual, I mounted my tag to black card.


Thanks so much for stopping by and having a look at my tag.  If you love foiling, as I love foiling, pop back for my next post for some more foiling fun!

Monday, 20 June 2016

Tag 6-20 "Happy Birthday"


Father's Day fell on my sister's birthday this year, which also happened on the day she was born.  It also was my parent anniversary.  Busy day!
So this tag is for my sister.  She is about 3000 miles away on the other side of the country.  I haven't seen her for several years now, though we speak often. But I miss her.  I was happy to hear that she had a wonderful day with my nephews  
Happy Birthday, Kerry!  Love and miss you xoxo

I made the larger flowers from scraps of patterned paper I had in my stash, as well as the butterfly. I trimmed the tag out of card I have on hand and the foiled die cut with the sentiment is the "waste" from another tag I did. I punched some leftover vellum and added some lace pieces from my stash. I hope she likes it!

Sunday, 19 June 2016

"Happy Father's Day" Tag 6-19 #onelittletag


Welcome my friends!
Today's tag is for my Father for Father's Day.
I cannot express with words how much I love and appreciate him.  One day a year is certainly not enough to show the gratitude I have for what he does EVERY day for my daughter and myself.  
We are blessed to have a very special "Papa".
Love you Dad!


Of course I had to add a bit of foiling! I stamped the foiled areas with some toner paint I have been working on making and will share with you when  I get it figured out.

Happy Father's Day to all the good father's out there, that love and cherish their children!

Monday, 30 May 2016

Foiling tid-bit Bonus!


Hello my friends!
This is not the foiling technique that I have been promising will come this week, it's a little bones that I kind of discovered by accident.
Today I am sharing a little foiling technique that I discovered while I was doing the glue resist technique with the rubber cement that I shared a few posts ago.

I drizzled the rubber cement onto my page to use as a glue resist.  I noticed that the glue was still tacky after it dried.  With the resist technique, I painted over it and then rubbed away with glue after everything was dry.

Afterwards, I wondered if the dry glue would be tacky enough to adhere the foil, so I thought I would give it a try.  I drizzled some rubber cement onto a scrap index card I had used to wipe up some paint.  I let it dry and put the foil on top and rubbed it firmly over the glued areas, and Voila!


I hope you enjoyed this little post.  As you can probably tell, I am having a good time with the foiling.  So if you like it too, you can look forward to some more great foiling techniques.  I have another one coming up this week, that I am kind of excited about!  And who knows what else I will discover as I am playing around, or what YOU may discover!

If you are interested, I did an earlier post on foiling.  Actually, the fourth post I had ever done!

Thanks for joining me!

.


Sunday, 29 May 2016

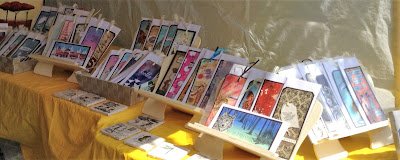
Artfest on the Esplanade


(lots of tags!  Many you may have seen from the FB group, One Little Tag Craft Challenge, that I am participating in))


Hello my friends!
This is what I was up to yesterday.  Every year, the City of Pickering, along with Pine Ridge Arts Council (PRAC) holds Artfest at the end of May.  There are Many different artisans displaying their work, from painting, photography, wood carving, lots of jewelry, glass work, textile work and many  more!
Often there are performing arts as well with dancers and bands.  This year the was a  Blues Fest and I was in a great spot to be entertained by the great music all day..
It was a beautiful day, although quite hot.  I ended up with a fantastic spot right near the entrance and shaded under the trees.  For some reason, it is often really windy at Artfest, which is a little annoying when you are trying to keep your display from blowing all over, and you wish the wind would stop!   Be careful what you wish for!  This year everyone was wishing for a little wind.  I have to say, I did get a little bit of a breeze where I was.  So, once the set up was done (it was definitely hot doing that), and I could just sit down and relax, I was pretty comfortable.
Usually, my daughter is with me at Artfest, helping out.  She can man the booth so that I can have a look around, chat with my friends that are also participating or take a bathroom break (it's a long day that calls for lots of water!).  But she was busy yesterday, rehearsing all day for her High Schools performance of "Hairspray", which she is STARRING in (how proud am I!).  It starts a four day run on Wednesday night.  So I doubt I will see much of her until it is over.  I can hardly wait to see it!  But I really missed her yesterday at Artfest.  She's always a great help and good company for a long day.
I have to say thank you to my friend Margaret, who was also doing the show, she was there if I needed a break, and thanks to my friend Bonnie, who cam by and she took care of things so I could have a look around.
There was a lot of people out, enjoying the weather, taking their dogs for a walk, having a beer and listening to some blues and just having a nice day.  So there were lots of people to talk to.  This is never a high sales  show for me, but I do it every year just because I enjoy it.

Mary and Cathy from PRAC were there, making sure things were on track and Mary got a lot of pictures of the show which maybe I will be able to add to this post,  or link to, if it's okay with Mary, and those of you that have never been can see what it's about and maybe join us next year!
Thanks for stopping by, have an awesome and artful day!

(TEASER:  Watch for more foiling techniques this week if you are interested!)

Sunday, 22 May 2016

An Awesome Foiling Technique! Foiled borders using your Spellbinders dies


Hello my friends!  I was inspired to try this technique by a video I saw  by Becca Feakin. (I will share the link at the bottom of this post)  She used her Spellbinders Labels dies and her laser printer to get  awesome foiled borders!  I have been wanting to try this for a while and now I finally have and I love the look.  I am going to use my tag from my last post to help illustrate how I did this foiling technique (and some other ones!)
First I dug out some of my Spellbinders Labels dies


Now, I knew I would be isong these to creat tags, in this instance, so everything I did was with that in mind.  You may want to make cards, as Becca did. if that's the case, keep that in mind as you position your dies. I will probably use this technique to make some cards as well.  I chose the  dies that I wanted to use and positioned them on some blank white card.  I adhered them in place using a tiny removeable adhesive dot.  I postioned them so that I could cut them out into tags.  I should mention that if you are making cards, you could take a Card Creator or rectangle die that would fit the perimeter of your card panel and position that as well, to give your card panel a nice gold border too.


I positioned 2 smaller dies that I would use for sentiments alongside a tag on this sheet


I scanned and made a copy of these.  I think Becca just put her dies directly on the scanner, but I wanted to have copies I could use again.  Not only that, but I found that the copies weren't really dark in some areas, maybe because the dies are shiny and reflective.  So I wanted to darken them as well with a marker.


Then I got some light cardstock, some white and some patterned and all trimmed to 8.5 x 11"  to run through my laser printer.  NOTE:  You must use a laser printer, an inkjet printer will not work.  You could also use photocopies, but your copy must be toner based!
I copied my images onto the card and cut them down into tags


Now for the foiling!  I use a laminator and I find it works just fine, but if you have a Minc, you would of coarse use that.  I use a plain copy paper, folded in half, as a carrier.  I chose the foil that I wanted to use, placed it over the copied image (pretty side up!) placed it in the carrier sheet and ran it through the laminator.  I usually run it through twice just to be sure.


Now I take the coordinating die, place it over the foiled image, cutting side down.  I use some washi tape to hold it in place.  If you have a look at your Spellbinder labels die, you will notice that the cutting blade is not at the very edge of the die, but in the middle. 
Because of that, you end up with 2 pieces with foiled edges that you can use, the inner and outer die cut shapes.  If you use a different kind of die with the cutting blade at the very outside of the die, you will only have a foiled edge on the inside die cut shape.


Now, how did I do the gold foil outside border?  And the foiling on the flower embellishments?   Stay tuned for another post on some different  foiling techniques. I've been doing some experimenting and as soon as I get everything together to post, I will be happy to share.  If you like foiling, you will love it! 

I hope you have enjoyed this post and will give this foiling technique a try.    Give Becca's video a watch, it is very helpful and she is really sweet and she makes it easy to follow.
If you liked my post and found this technique fun and informative, please share it!  And let me know if you would like to see more technique based posts.
Thanks for looking, have an awesome and artful day!


           Scrappin' Great Deals (SGD)  http://www.scrappingreatdeals.com/home.php


Note:  I use ThermOweb Deco Foil and Minc reactive foil

Tag 5-6 "Smile" Foiled Tag #onelittletag


Hello my friends!
This is tag 5-6.  This tag is for the "mothball" challenge, which challenges us to look in the back of the cupboards or shelves and dig out the forgotten treasures that we haven't used for a while, dust them off and give them some crafting love!   I haven't used my Spellbinder's Labels dies in ages!  I have actually been wanting to use those dies to try a foiling technique, so this was a good opportunity to get them out.  I and I am really happy with the outcome!  I have been doing some experimenting with foiling and I have used a few different techniques on this tag.
I will be dedicating a few posts to sharing these techniques with you.  So if you like foiling, be sure to come back and check them out, you will love them!


Thanks so much for stopping by and have an awesome, artful day!


Wednesday, 20 April 2016

Crinkled Tissue Textured Foiling #onelittletag #MMM


Hi there, thanks for joining me! 
I started off this blog doing some simple tutorials and I have kind of gotten away from that, so I decided it was time to do another.   This idea started off inspired by the Mixed Media Morsels FB group I have joined.  MMM # 5  uses tissue paper to add texture to your page.  I have used tissue many times on my canvases to add texture to my paintings.   So I have put a different spin on the challenge.  As some of you may know, I have been into foiling lately and a amassed a bit of a foil haul on my holiday. I was struck with an idea and what happened? The girl goes crazy!


I crumpled some tissue paper and put it directly on my scanner, wondering if the wonderful texture would translate to a useable image.


The image on the left is what I copied on my laser printer directly from the crumpled tissue paper.  I used this to print the copies on card.  The card on the right is a copy, which actually seemed to turn out darker.  I thought I would also copy some of the image on some coloured card for a different effect


I copied onto some light green, dark green (thinking of Christmas) and some black card (I love the look of foil on black card!)  Then I trimmed down the sheets.  These backgrounds will eventually become tags for the One Little Tag Craft Challenge, another FB group I belong to.  I trimmed down the foil, put it over the printed tag (foil side up), put it inside of folded copy paper as a carrier and ran it through my laminator.


I love the way they turned out.  It's difficult to photograph the foil so these don't do the tags justice.  But hopefully you get the idea and may want to give it a try as an interesting background for a card or a tag or in some of your other artwork.