Showing posts with label die cut. Show all posts

Tuesday, 13 February 2018

" Castle on the hill" tag for music prom a t#onelittletag


Hello my friends!
As you can probably tell, I have been having a lot of fun with the music prompt atThe One Little Tag Craft Challenge Facebook group.  I created this tag based on Ed Sheeran's song "Castle on the Hill".
I created a back ground for my tag bye blending on some distress ink in blues and greens, creating my hill.

I die cut my castle from a spellbinders die set.
I positioned my castle on the hill without adhering it to determine where I wanted my pathway to be.


Then I created a mask ask for the pathway. I use low tack shelving paper to cut my masks from. It is inexpensive, I get it from the dollar store, and it works well. I did tap it on to my clothing before adhering it to make it even less tacky. I'm positioned my pathway with the mask and then blended some darker green at the edges of the path and splattered on some red and white dots. I use distress ink, which I smooshed on to the craft met and added water to for the red dots and I used my opaque Copic White, which I also watered down to splatter on the white. I also splattered on some clear water droplets because I love that effect with the water reactive distress inks. Then I removed the mask for the pathway and use the negative sections to create a mask for the hill leaving the pathway open. Then I blend it on various brown distress inks and added some water droplets and a little bit of water on a brush to create some horizontal lines, which ended up getting blended  out for the most part. I also splattered some gray ink and white dots on my castle, and did some edging with some distress ink as well. I used the distress ink and a pen for the castle door. And when I had everything out, I also splattered some distress ink and Copic white on some gray card stock that I cut down to use as a mat for my tag. I wanted it to look a little bit like stone, too match the castle.
I adhered my castle, and I used a little punch to punch out some flowers from some scrap cardstock I had. I used my label maker to print out the words. I edged those with some distress ink. I also used a little punch to create the butterfly from some scrap paper I had. I adhered the little flowers and butterfly, as well as the words, which I printed with my label-maker, to my tag.


I used a couple of my faber-castell Pitt pens to add some shadowing as well as my white Posca paint pen for some highlighting details. Once everything was assembled, I glued my tag to the gray mat that I had created, and then to the final black matte to finish it off. I really like how Whimsical this tag turned out to be, which was actually my intention!
Well I hope you enjoyed my castle on the hill tag. I really enjoyed creating it. Thank you so much for stopping by and having a look and I hope to see you soon with my next tag. Have an awesome and creative day everyone!
Kim xo

Monday, 5 February 2018

An Elegant Purple and Gold Card #onelittletag


Hello my friends!
I am a little behind in posting, but this is a card I made for the purple challenge last week on The One Little Tag Craft Challenge.   I just love the combination of purple and gold.  If you are following along, you may have noticed that.  Most of my purple themed cards or tags are using that combination.

For this card I used a Spellbinders die and cut out some gold foil board.  FYI, I get my gold foil board  at the dollar store.  Both Dollaramma and the Dollar Tree have the same foil board.  It comes in a package of 6 sheets 0 gold, silver, red, green and blue.  It's very handy at Christmas time!  I just wanted to mention this because I really like the foil card that I get there and it die cuts beautifully.  Sometimes a cheaper price doesn't necessarily mean an inferior product.   Anyways, I die cut my foil card and adhered it to some purple glitter paper, which I then adhered to a black card base.  It is sometimes difficult to stick to the glitter paper, so I ran it through my Cuttlebug just sandwiched between the plates to squish everything together in an attempt to make it adhere better, which it did. .  It almost made this look like a die cut inlay.  I really like the effect that created.  I added a few sparkly embellishments and left it as it is.  I will keep this in my stash and when an occasion comes up that this card will be suitable for, I will add a sentiment.  I think this is quite elegant with the gold foil details.
I hope you have enjoyed my latest card.  Thanks so much for stopping by to have a look!
Havve a great day everyone!
Kim xo

Sunday, 28 January 2018

"Hugs" tag for "purple " challenge at #onelittletag


Hello again , my friends
Here is another tag I made for the "purple" theme this week at The One Little Tag Craft Challenge.  I used the negative space created whenn I punched out the "heart-shaped moon" for a tag I did last week.  I'm glad I didn't throw the scrap  away!  I backed the heart area with some purple glitter paper.  The background was made from some of the "spray play" papers I created previously.  I used a small punch to cut the little hearts out of gold foil card and a Recollections die for the word "hugs", I cut it again from black card that I used as a drop-shadow..  I mounted to a gold mat and a black mat to finish it off.  I am having fun with purple!
I hope you enjoyed my tag and that it will inspire you to make use of some of the scraps that you might normally throw away.
Have an awesome day, overtone!
Kim  xo

New "Dream" tag for "purple" t challenge at #onelittletag


Hello friends,
This weeks theme at The One Little Tag Craft Challenge  was purple inspired by the new pantone colour of the year.  We are doing any purple for the challenge, though.  I had a bit of a crazy week, so I didn't actually finish any tags until Friday night, but I did work on them, in bits and pieces, throughout the week.  Purple is okay.  It is not my favourite, nor my least favourite colour.  I didn't find it overly inspiring, or so I thought!  I thought I would look around for some patterned paper (of which I have reams and reams, lol) but not much in the way of purple.  It's just not a "go-to" colour for me.  Then I thought I would look through my "spray play" backgrounds that I created previously.  I was completely surprised to see how much I actually used purple. That was the jumping off point, suddenly I was totally inspired.  I created several tags this week, and may still make a few more!

I created this tag using a background I made using a variety of spray inks and stencils, this one on shimmer card from Recollections.  I thought the background looked kind of "dreamy" so I used a Recollections die to cut out the word.  One combination I really like is purple and gold, so since I am using purple, there is going to be a lot of gold in the cards and tags that I make!  It's hard to tell in the photo, but there is a lot of shimmer and veins of gold running through this background.  I liked how this tag turned out.

I hope you enjoyed today's tag, and thanks so much for stopping by.  If you did, I have made several tags for the purple themed week, so please come back and check them out!
Have a great day everyone!
Kim xo

Tuesday, 23 January 2018

Live Love Laugh tag for #onelittletag


Hello my friends!
I am back with another tag for The One Little Tag Craft Challenge I have to tell you, Ii have been taking pictures with my Samsung tablet and I am not very happy with the quality.   I apologize and I am going to be looking at alternative devices.  I hope you can bear with me in the meantime!

For this tag I used one of the backgrounds I created at the beginning of January using sprays and stencils.  I used a few different card stocks to work on, this was a shimmer card.  I couldn't capture that with the photo.  TBH, it's a pretty subtle effect , but I like it..


I used a Recollections die to cut the words out of some scrap copper metallic card and some black card as a drop shadow.  I used a butterfly embellishment that I rediscovered as I was going through my stash.  I'm not sure where I got it from, possibly a dollar store.  Then I mounted to a glitter paper and black card, all 1/4" larger than each other, to give my tag a double mat.

Thanks so much for stopping by.  Ii hope you enjoyed this tag and will be back to see the next one.  Have an awesome, art-filled day!
Cheers
Kim  xo

Monday, 22 January 2018

A new Love tag for #onelittletag


Hello!
Here is today's tag.  Still based on the "Love" challenge on tthe One Little Tag Craft Challenge FB group.  This tag was inspired by the Tim Holtz "Clippings Sticker".  I used a Recollections heart punch to punch a mask.  I use low-tac shelving vinyl as masking.  I positioned it on my tag, used some washi tape to create a horizon line and used a few different distress inks to create my background, blending in from the sides to leave a lighter area in the centre as the reflection of the moon.  I punched the moon out of some papers I had sprayed the first week in January to create some backgrounds.  I used my Spectrum Noir to add some shimmer. I added some shimmer to the water as well and to add a halo around the moon.  That didn't work out exactly as I would have liked, but I continued on.


I used some Penny Black stamps to create the foliage silhouette. Using some black glitter paper, I used  a punch from my stash for the dragonflies and a memory box die for the fairy (I love fairies!).  I added the Tim Holtz sticker and then mounted the tag to a black glitter paper backing.

Thanks for taking the time to have a look, I hope you enjoyed todays tag.  I have a few more ides, so there may be another tag today, so pop back if you are interested.

Cheers!
Kim  xo


Saturday, 20 January 2018

"Love Tag for #onelittletag


Hello my friends!
I was gone for so long, and now here I am, back again so quickly after my last post!  Feast or famine! The theme for the One  this week was "Love"  I was really pleased with the outcome of this tag.  I would love to be able to take credit for the design, but I can't, it was totally inspired by a couple of different cards that I saw on Pinterest.  I thought the design was simple but so effective.  I really liked it and wanted to give it a try. I'm not 100% sure how those were created, but I did what I thought would recreate a similar look.  I used distress inks in worn lipstick and Barn Door as watercolours.  I "smooshed" them (very technical term!) on my craft mat and used an aqua brush to paint with them.  I didn't use watercolour paper, I used Strathmore Bristol, and it held up well.  I wet the card fist and added the colour..  Then I used a brush pen to write a long script "love".  Then I die cut a heart from a Spellbinders die in my stash to create a stencil.  I used the Barn Door ink to stencil the heart.  I flicked a little water around, as distress inks are water reactive.  Then I "Smooshed" some more ink on my craft ma, spritzed it with a little water and used my brush to splatter it on my tag (I just love splatter!)  Then I scribbled some black ink from my brush pen on the mat and did the same thing..  I mounted it to some heavy black card and called it a day.  Although I am considering mounting it to some red card as well to give it another slim border all around.  Hmmm...


This is the other tag I created this week.  I used some patterned paper from my stash that had the word "love" all over it.  I used some Spellbinders Celebrations Hearst die to cut some hearts out of some of the other patterned papers in the same pad.  I also cut the heaty out of the background and inlayed all the hearts. I used a Tim Holtz stencil with some Barn Door distress ink over the entire background.  I tried to use white ink first with the stencil, but it really didn't show up very well. Then added some white splatters with some watered down white copic ink.  I die cut the "Love" using a Recollections die out of Recollections card.  I used the same red card as a backer to my tag.

I hope you liked my tags.  I have some more ideas for the "love" theme, so I will be back soon with some more tags!
Thanks so much for stopping by
Kim  xo

Friday, 30 December 2016

A few more Christmas Cards - Using one basic layout


Hello my friends.  As I mentioned in yesterdays post, I have created a few more cards using the same basic layout as the card I did for my friend Margaret.  Each one is a little different and unique, but a lot of the work could be done at the same time, assembly line style.  All the stock could be cut at the same time, all the pieces cold be die cut at the same time and the assembly could be done at the same time.  What I like about doing some mass producing of cards is that it is a definite time saver .  What I'm not crazy about when it comes to mass producing cards, is that they are all the same and often one layer and fairly simple...sometimes.  Don't get me wrong.  There are some very beautiful and elegant, yet simple, one or two layer cards that are very effective (I should make a point of trying to make some of them, actually!).  If you have a lot of cards or invitations too make, that is certainly a wise way to go.  Bottom line, they are all still hand-made with love.  I like to go somewhere in the middle.  Using common elements is much more time efficient, but changing up the patterned paper, or colour of stock, the stamped images or the arrangement of the elements is one way to keep each card unique and personal.  Sometimes, the creation of one card will inspire you to create more because you like how it turned out.  This was the case here.  I liked the way Margaret's card turned out, but that card was very personal too her and her husband because of the dogs., so I made some changes.
These cards definitely still took  quire a bit longer than a single layer mass produced card, as each piece was distressed and inked and die cut or trimmed.  But they were quicker than designing four cards from scratch.  Often, I find that the designing of a card takes the most time.  Another good reason to recycle one that you like.  You can take one basic layout and keep it as simple, or make it as complex, as you like.


I don't typically follow a card sketch, but there are some great ones on-line that can get you going when you are stumped.  One that I have used is Mojo Monday.  They have loads of card sketches and do contests and challenges as well.  So if you find yourself stuck when trying to create a card, go back to some of your favourite cards that you have already created for some inspiration, or if you want to try something totally new, try finding a sketch on-line.
This is an example of a Mojo Monday card sketch, follow the link above to have a look at more sketches

Well, I hope this will be helpful when you find yourself in a creative card rut, which happens to most card makers at some point, and are looking for that little push.
Thank you so much for stopping by.  I am looking forward to sharing lots of cards and art and posts with you in 2017.  Please let me know in the comments if there is anything  you would like to see on my blog and I will do my best to make it happen.
Have an awesome and artful day! xo

Thursday, 29 December 2016

Merry Christmas Card


Hello my friends!  Sorry that I have been absent for a bit, but this season is such a busy time.  I hope you are all having a wonderful holiday filled with family and friends and lots of love.   My sister is requesting more Christmas cards, she is not ready to give up the season.  So for the next little while I am going to continue with the Christmas cards.  
This is one that I made using a similar layout to the last card that I posted.  I wasn't going to post this card, but Kerry (my sister) called me and said she was waiting for me to do a new post!  Some of you may have noticed me mention, Kerry.  She lives 3000 miles away on the other side of the country and my blog is one way that I can share my cards and art with her.  So, I decided to post this card, after all.  I also thought it might be helpful to show how you can take the same basic layout and switch it up a bit to get a different card.  I have done another card based on the same format that I will share tomorrow (it just needs a few final touches).

Thank you so much for stopping by!  Again, hoping everyone has a wonderful holiday and all the best for a healthy, safe , happy, prosperous and definitely a creative and art filled New Year!!!  xo
Friday, 16 December 2016

New Christmas Card - Lawn Fawn Sprinkled with Joy


Hello my friends!  Today i have a new card creation for you.  I really enjoyed building my little scene with the Stampendous Truck and the Tim Holtz die, so I thought I would do another one.  This card was created using the Lawn Fawn "Sprinkled with Joy" stamp and die set, which I just think is sooo fin!  There is and Add-on die available for this set, that turns the oven into an interactive feature.  I got this die and have used it here.  You certainly don't have to get this additional die, but it is fun!  I also used a Sizzix stamp and die set along with the Lawn Fawn set.


I stamped and cut all my pieces using my DIY stamp positioner, which comes in really handy with stamp and die sets. especially if you want to make multiples.  I did, since I had everything out and just put them in (uncoloured) with the set so that the next time I want to make a card, they will be ready to go.


I cut the cookies and cookie cough out of kraft card, and the cookie tray and oven handle out of silver foil board.  I cut the tea towel out of some patterned paper and trimmed a little mat out of some patterned paper as well.  I trimmed out some velum to use for the oven window.
I decided to make this a larger card, so my finished size will be 8.5 x 5.5.  This way I could get a lot of elements in.  Now to build my little scene! I took advantage of the 70% off deal at Michaels and got a patterned paper pad among other things, lol, maybe a little haul post is in order!) and decided to use some of it for the floor and the wallpaper..


 I trimmed some planks out of the wood grain paper and edged them with vintage photo distress ink before adhering them.  I used my Spectrum Noir markers to colour in the stove and all of the other elements. I used patternedcard from another card pack I got at Michaels for the counter.  I trimmed it out and shaded it with the markers.  Once I coloured all my elements. I assembled my card.  I created the cupboards by trimming  them out from some scraps.  I edged them and drew in some handles.

I used a sentiment from a stamp and die set that I have had for ages and never used.  It seemed perfect for this card/

Once my card was all assembled. I mounted it to some embossed card that I had on hand.


Thi card didn't turn out anything like I first envisioned it.  At first the cupboards were going to be white and the stove was going to look like stainless steel.  But once  I started doing the floor and adding the wallpaper, I started to get a retro feel.  I wanted to do the stove like the old "avocado green" stoves from my childhood.  Remember those?

This card took me a while to make, nut itis a fun and interactive.  I hope you enjoyed it!
Thank you so much for stopping by!    Wishing you an awesome and artful day!

Friday, 9 December 2016

A Truckload of Christmas Wishes Ver. 2 - New Christmas card


Hello again my friends!  As promised, here is version 2.  As I am looking at it here, I think it needs a little something more.  I'm not sure what, perhaps the background needs to be a little darker and with more interest.,  You can barely see the snow falling in the background.  I should be able to fix that fairly easily.  There will be a third card in this series, but it requires a little more assembly and it is way past my bedtime!  Teaser alert- I will be combining with a Tim Holtz die!  I will have it posted in the next day or so.


Thank you again for stopping by!  Have a wonderful and artful day!

A Truckload of Christmas Wishes - New Christmas card


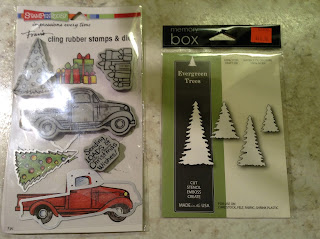
Hello my friends!  A new Christmas card to share today.  I have to admit, I'm not usually one to do a lot of colouring.  With my vision it is very difficult, so I tend to keep it very basic and "rustic".  But I had seen this stamp and die set on-line and I just thought it was so cute, I had to have it.  After I ordered it, I saw it at Michaels (where it had not been a couple of days before, lol)  I was so anxious to receive it, but the truth is, things have been so hectic that I am finally just getting to use it now.  I decided to try a little scene building.  So I got out a few more stamps and dies.


(please excuse the photos, I am having some lighting issues right now)


First I stamped my house and created a mask to cover it while I created a background.  I used Broken China distress ink for my background and splattered it with some Heidi Swapp white Color Shine.  I used some torn paper to create my snow drifts.   I used my Spectrum Noir markers to colour th truck and presents and the house.  The window actually die cuts right out of the truck, but I popped it backed in and added a suggestion of a driver.  I thought a driverless truck would be a little creepy!  I used my snow marker to add some snow to the trees and house.

Once all my colouring and die-cutting was done, I assembled my card.  I added some shimmer with my Wink of Stella.  I mounted the card-face to some patterned paper to vorder it, and then to my card base.

I also cut and coloured a few more trucks at the same time, so I will be posting another card shortly that I have just about finished,  Then there will be another card coming down the pipeline soon.  I feel it makes sense to use your materials while you have them out.  but you don't necessarily have to make them all the same, although mass producing isn't a bad idea, either.  So if you like this card (which I hope you do because it was fun to make!)  Then check back in to see the next version very shortly.
Thanks so much for stopping by!
Hugs!

Monday, 5 December 2016

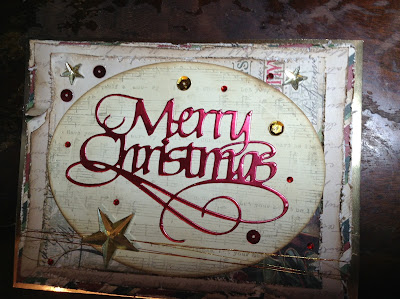
"Merry Christmas" new Christmas card


Hello my friends!  A very quick post to share my latest card with you.  I was looking for a poinsettia die  and I found this stamp and die set..  I actually passed it by a few times because I didn't like the way the example looked.  I do have some poinsettias dies, but not one that I love.  After about the third time I was at the store (Michaels) and during a 50% off deal, I finally gave in.  I'm glad I did because I do like it.  I hope you do, too!

The Merry Christmas sentiment was from my stash.  It is an Yvonne Creations die from Find It Trading.

Thanks so much for visiting and make sure to check back in for more Christmas cards.  Feel free to share with anyone you tihnk may want some  holiday card inspiration.
Have an awesome day!

Sunday, 4 December 2016

Winter Wonderland II- A secon version of my latest Christmas card


Hello again my friends!  While I had everything out, I thought I would make some more cards.  I didn't have any more of the patterned paper that I used on the first card.  I decided to go with white on white.  I embossed the white card.  I used some distress ink to blend a background and splattered it with some water and Heidi Swapp spray.


Thank you again for stopping by.  I hope you enjoyed my second version of my Christmas card.  This is a card that has several layers, but would still be suitable for making multiples. I would love to know which version you like best! 
Have an awesome day!