Showing posts with label #mixedmediamorsels. Show all posts

Monday, 5 September 2016

Tag 9-4 Another Christmas Tag using the crackle background #onelittletag


Hello my friends!
Today was my birthday and my friend Bonnie gave me the new Kaisercraft "Frosted" stack.  So naturally, since I enjoy making them anyways, I'm in the mood for Christmas tags.


I have been wanting to make a tag using the background I created using the crackle technique for Mixed Media Morsels. I knew I wanted to use it for a Christmas tag


I cut out ephemera from my new paper and edged it with vintage photo distress ink.  I took a sled I had previously die cut from gold card out of my stash.  I also got a "Recollections" Christmas flower from my stash.


I used some Glitter Snow, Diamond dust and Stickles to embellish the tag.  I layered onto some white gold shimmer card and then mounted onto heavy black card.

Thank you so much for stopping by!  I hope you enjoyed  my tag today.  If you are new to my blog and have been enjoying my tags and like to make tags yourself, you may want to check out the FB group that started me on this tag making journey! it is The One Little Tag Craft Challenge
Have an awesome and artful day!

Wednesday, 31 August 2016

Very Cool Crackle paint technique MMM#27 #Mixed Media Morsels


Hello my friends!  I also belong to a FB group called Mixed Media Morsels created by Cat Hand.  Some of you that may have been following along for a while, may have seen some other "morsels"  I have participated in.  Sometimes I spread myself a little thin, consequently, there are a lot of morsels that I have yet to do.  But this technique intrigued me, so I made a point of doing it.  I have used crackle pasres before, but I did this with plain old Elmer's glue!  Not bad!  Here is a link to Cat's video that inspired me to try this.  Mixed Media Morsel #27  She is using a crackle medium, but mentions that the same can be accomplished with glue.

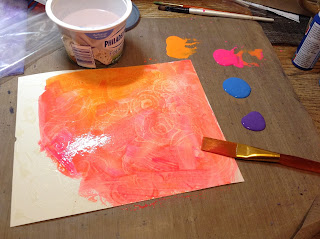
First I inked my background using Tim Holtz distress inks so that it would be darker through the cracks.


I have found that you can create an interesting background by rubbing your paper or card over the ink pads after blending your initial background.  Although, you won't see much of this using the crackle technique!

After I had inked my card, I applied a decent coat of glue (I used Elmer's, I'm sure others would work, but it probably should be white school glue")


I let it dry for about 15 minutes, which seemed to be just about the perfect timing. Then I added a coat of acrylic craft paint.  According to some of the posts on Mixed Media Morsels, the timing is important, too soon or too late and you don't get a good crackle effect.  I guess I was lucky with my first attempt,  so I don't know first-hand what happens with a different timing


The one in the top right corner had an almost instant effect!  The other two that I did took a little longer, but not much.  You can see results quickly, but let it dry thoroughly before trying to work with it.


Thanks for stopping by to have a look at this technique and a big thanks to Cat Hand for sharing it.. I hope you think it's as cool as I do!  I will be creating some tags with these backgrounds, but I was so excited that it worked so well, that I wanted to share right away!  There are many people that would not understand why this would excite me, but I'm sure most of you do, lol!
Hope you give it a try and have some fun.  Have an awesome and artful day, my friends!

Sunday, 12 June 2016

Tag 6-11 "Elegance et Emerveillement" #onelittletag


Hello my friends, sorry it's been so long!

  We've had some technical difficulties, got a new computer and since I am completely lost when it comes to computers, I'm having a hard time figuring out a new and unfamiliar one. It tock me forever just to figure out how to get this photo off my iPad, and I'm still not sure how I did it! (sad, I know!)
  I haven't made a tag for ages!!!  So I am glad to have a new one to share. This tag was made with a napkin I got at the St Lawrence Market in the background and using some of the awesome new Carabelle Studio stamps that my friend Lynn picked up for me in Montreal.
I hope you liked t and I will be back regularly now.  Thanks for stopping by and have an awesome and artful day!

Saturday, 28 May 2016

Glue Resist Technique MMM #4 #onelittletag


Hello my friends!

Today Ii am doing a glue resist technique which will become (eventually) a background to some of my tags and my take on MMM #4.  Cat Hand, of Mixed Media Morsels used a regular school glue  to draw some designs on her page.  She let it dry and used it as a resist. She watered  down some paint, painted over the glue and could just wipe the paint off of her design. She also ran her ink pad over the top (once dry, the glue had some dimension) to highlight it, and it looked pretty cool.   It reminded me of a similar technique I had been wanting to try.
I used rubber cement as my glue, drizzling it all over my page (watercolour paper).  Once dry, which didn't take long, I also watered down some craft acrylic paint and painted my page


Once the paint dried, I rubbed the rubber cement away, leaving the white paper underneath


Thanks for stopping by, I hope you enjoyed my technique today!


Monday, 23 May 2016

MMM #11 Torn Paper Strips Mixed Media Morsels

Welcome to my blog!
This is a background I created using torn paper strips, a prompt from Cat on the Mixed Media Morsels FB group.  Cat Hand posts weekly videos with different mixed media techniques to try.  She calls them "morsels".  I have been doing my morsels in a random order.  Sometimes they might work with a tag challenge that I am doing, or sometimes Ii may have supplies out that will work with a particular morsel, or sometimes there may be one that I am just in the mood to try.  I did join this group a little late, but there is no pressure to get anything done by a specific time and they are all just suggestions.  Everyone does them their own way.  But again, as in the One Little Tag Craft Challenge FB group that I participate in, it's all about staying creative and inspired.  Keeping it fun is a big part of the creative process, in my opinion anyways!
For this technique, I took some printed tissue (that I used for MMM #5 an earlier post), some plain tissue paper and some plain white paper.  I used various different sprays, Dylusions, Heidi Swapp, Recollections Colorsplash or Boho and some Lindy's stamp gang..  I sprayed the paper and tissue, let it dry and then tore it into strips.  I collaged the strips onto the tag with mod podge.
I like the way this turned out and I have lots of papers left to collage some more tags or maybe a canvas.
Thanks for looking, have an awesome and artful day!

Friday, 20 May 2016

Mixed Media Morsel #5 - Tissue paper background


Hello my friends!
Todays tag is for the Mixed Media Morsels group.  This is MMM#5, which is a prompt to use tissue paper as your background.  I used Tim Holtz printed tissue paper, mod podged it onto my tag.  I then used various  Dylusions sprays to colour it.  For the finishing touches, I used my Gold ink pad to swipe across the raised areas and along the edges and finally, some black archival ink on the very edges.  Oh, and of coarse, some splatters!  I like how this turned out.  I'm not sure how I am going to finish off this background into a tag, but I will be sure to share when I do!
Thank you for stopping by.  Have an awesome and artful day!

Tuesday, 17 May 2016

Tag 5-7 "Trust the Magic" MMM 19 #onelittletag


Tag 5-7 "Trust the Magic"
Welcome to my blog!
A tag for the mothball challenge, which was the first week of May on the One Little Tag Craft Challenge. This tag is also doing double duty for both FB groups I am participating in.  Last weeks Mixed Media Morsel prompt was Silhouettes. 
I didn't use a magazine picture for this, as Cat Hand did on MMM, I used stamps and dies.. I used distress ink for the background and splattered it with water containing perfect pearls.  Distress inks are water reactive and I love the effects that you can get.  I used a Penny Black stamp for the flowers (pretty weeds?) silhouettes and a Prima stamp for my sentiment. I used 2 different Spellbinder dies for the Fairy and the Dandelion. As for the mothball challenge, I haven't used my  fairy die, black glitter paper and perfect pearlsfor a while
Thanks for stopping by and having a look!  Have an awesome and artful day!

Monday, 16 May 2016

Tag 5-13 "Hello" #onelittletag


Helloo my friends.  This is another paper napkin tag that I am doing for the FB groups that I belong to (One Little Tag Craft Challenge and Mixed Media Morsels).  As I mentioned in my last post, I am keeping it brief, this is about sharing the tag because you have been bombarded with the process all week!  However, if you are new and would like to know the process, please look at my previous posts this week.  I hope you give it a try and have some fun!


I've had a lot of fun with these paper napkin tags this week, I hope you enjoyed them!  I still have some backgrounds I made that I haven't used, so you can expect to see a few more at some point.
ALSO, for those of you that enjoyed the foiling techniques I have shared, there will be another one this week, so stay tuned!

Thank you for stopping by and having a look!  Have an awesome and artful day!


Sunday, 15 May 2016

Tag 5-12 "From New York to Paris" #onelittletag


Welcome to my blog!  I am still doing the paper napkin prompt for my tags,  so I am going to keep the next few posts brief because you've been hearing about the process all week!  So these are just about sharing the tags.  However, if you are new to my blog and are interested in knowing the process, please look back at my previous posts this week.  I have been enjoying myself and liking the results.  I hope some of you give it a try!


Thanks for stopping by!


Tag 5-15 "Buongiorno!" #onelittletag Napkin tag


Hello, my friends.  One more napkin tag today for the FB groups,  One Little Tag Craft Challenge and Mixed Media Morsels


As before, I first peeled away the extra layers, them mod podged to card and trimmed to size, then played with some distress paint, stamped a sentiment, did some inking of the edges and finally, mounted the finished tag to a black cardstock..  Phew!, that was a mouthful!  I am trying to keep it short because if you have been following along, you have been seeing the same description all week.  But, for anyone new, I want to give a brief "how-to".  If you are new and you like this technique,, I have been making napkin tags all week so you can check out my previous posts if you are interested.  I have been having fun!


Thanks so much for stopping by!  Have an awesome and artful day!


Tag 5-14 "Bonjour" #onelittletag Another napkin tag


Welcome to my blog!  Another one of my tags for the paper napkin prompt in both the One Little Tag Craft Challenge and the Mixed Media Morsels group on FB.


I was very surprised at the great selection of napkins at Dollarama.  I've never really noticed napkins before, but I like how these tags have been turning out, so I will be on the lookout for some interesting ones now!
As I mentioned in my previous post, I first peeled away the extra layers of the 3 ply napkin and then mod podged it to card and trimmed to 3.5" x 8"


Then I added the splatter that I love so much and I used a Prima stamp for my sentiment, tearing it to size and inking the edges with distress ink.  I edged the tag with black archival ink and mounted to a black card.


Thank you for stopping by and have an awesome day!


Saturday, 14 May 2016

Tag 5-11 "Create" #onelittletag #mixedmediamorsels


Hello and welcome to my blog!
This tag is  the third in a series of tags I am doing using a paper napkin prompt for a FB challenge I am participating in.
I started off with a pink polka-dotted napkin I got at the dollar store


The first hing you need to do is peel away the layers.  Most napkins are 2 or 3 ply and you want to use only the one printed ply.  Then I mod podged it to some card and cut it to the size I prefer (usually I do my tags 3.5" x 8")

Then I used a Heidi Swapp stamp to add some script here and there with archival ink.  I used my distress paint to splatter and marks my tag.  I used a Tim Holtz stamp to stamp my sentiment on card and also on the tag.  I then cut it out of the card and glued it in place on the tag.  The reason I did this is because I wanted the letters to be white and there were areas of the stamp that would be impossible to cut out and I wanted to maintain them, so this way I achieved both.  Finally, I edged the tag with black archival ink and mounted it to black card.

I hope you enjoyed my tag. I also hope that maybe some of these posts will inspire some of you to try some things that you may not have tried before, or rediscover some of the things you have tried in the past.  Have an awesome and artful day!

Tag 5-10 "Delightful" Another Napkin Tag #onelittletag


Hello my friends! Welcome to my blog. I have a few more tags to post, continuing with the napkin prompt on the One Little Tag Craft Challenge.  For those of you that are new to my blog, this is a Facebook challenge, hosted by Jenny Barnett Rohrs of Craft Test Dummies.  The idea is to do just one little tag a day (or every few days, or a week or whatever you can manage) and the objective is to be creative very day and keep inspired.  Jenny provides a prompt every week to help keep everyone motivated because let's face it, it's hard coming up with a new idea every day.  It is just a suggestion, in no way compulsory.  However, I am finding that I am getting a little hung up on these challenges sometimes, feeling that I should be doing them when sometimes I just want to do my own thing.  Doing my own thing is perfectly fine and sometimes I need to remind myself of that.  Using napkins in your art happens to also be a prompt in another FB challenge I am participating in, Mixed Media Morsels.  It is MMM #17.  Having said all that, I am surprised. I am really enjoying this challenge and I didn't expect it would be this fun.  So it goes to show you, it pays to at least give something a shot, even when you don't have high expectations!


I started off with my dollar store napkin find.  First I peeled away the extra layers (usually napkins are 2 or 3 ply) as I mentioned in my previous post.  I them glued it to some card with mod podge and trimmed it to the size I wanted


Then the fun begins with mark making and finishing touches.  I used distress paint in white, black and bronze to splatter and make marks with plastic caps.  I edged the tag with black archival ink.  I used a Fiskars stamp on card, trimmed it out and punched the corners.  I then edged it with distress ink before adding it to my tag.  And, as I usually do, I mounted it to black card.


Thank you for stopping by, I hope you enjoyed this tag.  I have another coming right up!


Friday, 13 May 2016

"Adventure" Tag 5-9 #onelittletag


I still have some tags to catch up on, which I will eventually, but I decided I wanted to do the challenge for this week.  We were challenged to use napkins to create our tags this week.  I am not a collector of napkins, and quite honestly, haven't really paid them much attentiom.  S. off I went to the dollar store to see what I could find.  I was surprised to find that they had some pretty cool napkins!


The first thing I did was peel apart the layers.  Most napkins have 2 or 3 layers.


Then I glued the napkin to some card with mod podge.


Then I had some fun doing some splatters and mark making with distress paint.  I inked the edges with archival ink and used a Tim Holtz stamp  for my sentiment.  And as usual, I mounted the tag to some black card.


Thanks for stopping by my blog!