Showing posts with label Spellbinders. Show all posts

Tuesday, 13 February 2018

" Castle on the hill" tag for music prom a t#onelittletag


Hello my friends!
As you can probably tell, I have been having a lot of fun with the music prompt atThe One Little Tag Craft Challenge Facebook group.  I created this tag based on Ed Sheeran's song "Castle on the Hill".
I created a back ground for my tag bye blending on some distress ink in blues and greens, creating my hill.

I die cut my castle from a spellbinders die set.
I positioned my castle on the hill without adhering it to determine where I wanted my pathway to be.


Then I created a mask ask for the pathway. I use low tack shelving paper to cut my masks from. It is inexpensive, I get it from the dollar store, and it works well. I did tap it on to my clothing before adhering it to make it even less tacky. I'm positioned my pathway with the mask and then blended some darker green at the edges of the path and splattered on some red and white dots. I use distress ink, which I smooshed on to the craft met and added water to for the red dots and I used my opaque Copic White, which I also watered down to splatter on the white. I also splattered on some clear water droplets because I love that effect with the water reactive distress inks. Then I removed the mask for the pathway and use the negative sections to create a mask for the hill leaving the pathway open. Then I blend it on various brown distress inks and added some water droplets and a little bit of water on a brush to create some horizontal lines, which ended up getting blended  out for the most part. I also splattered some gray ink and white dots on my castle, and did some edging with some distress ink as well. I used the distress ink and a pen for the castle door. And when I had everything out, I also splattered some distress ink and Copic white on some gray card stock that I cut down to use as a mat for my tag. I wanted it to look a little bit like stone, too match the castle.
I adhered my castle, and I used a little punch to punch out some flowers from some scrap cardstock I had. I used my label maker to print out the words. I edged those with some distress ink. I also used a little punch to create the butterfly from some scrap paper I had. I adhered the little flowers and butterfly, as well as the words, which I printed with my label-maker, to my tag.


I used a couple of my faber-castell Pitt pens to add some shadowing as well as my white Posca paint pen for some highlighting details. Once everything was assembled, I glued my tag to the gray mat that I had created, and then to the final black matte to finish it off. I really like how Whimsical this tag turned out to be, which was actually my intention!
Well I hope you enjoyed my castle on the hill tag. I really enjoyed creating it. Thank you so much for stopping by and having a look and I hope to see you soon with my next tag. Have an awesome and creative day everyone!
Kim xo

Thursday, 8 February 2018

Pretty Tag made from scraps for #onelittletag


Hello my friends!
Well, Wednesday is usually an Art Club day (Ajax Creative Arts), but the weather did not cooperate, and we had a snow day instead.  That doesn't mean that I  couldn't have a crafty day, though.  I will confess, I did not leave the house and wore comfy p.j.s all day!

For those of you that are new to my blog, at the very beginning of the year, I created several background sheets using spray inks and stencils.  I call them my "spray play" sheets and I created them to cut dowm into tags, or collage or use as backgrounds for an art journal page (which I am determined to do this year!)


I have cut out several tags from these pretty sheets already. (if you scroll through my blog you will see many of those tags) and I have been saving some of the scraps to use later to create  a different background


Some of the offcuts just looked so pretty to me that I didn't want to throw them away.  I had little bits from other papers I had used as well and I decided I would save them and create a tag with them.  I glued them down to some card and them trimmed all around.  I edged all around with gold ink.


I also did some die cutting today.  I find die cutting therapeutic for some reason.  I think I get a certain satisfaction when I run a paper through my die cutting machine and it comes out as a beautiful and intricate embellishment.  Sometimes I will die cut for hours and never actually create anything. True story, a Mimi fact, lol.  A snow day is a perfect day to bring out the Cuttlebug!


So this tag has a lot of die cut elements.  I created the flower using some lovely vellum.  Now, here is the day coincidence.  The new prompt for OLTC had not been posted yet this week and it turned out to be "music", to be interpreted any way we like.  So this tag, with its music notes, qualifies although I had no idea when I was making it! I think I will have some fun with this weeks prompt.  Stay tuned!

Thank you so much for stopping by to see what I have been up to.  For those of you that are crafty, I hope I have inspired you to use up some of those scraps instead of throwing them away, and  create something!

Kim xo

Monday, 5 February 2018

An Elegant Purple and Gold Card #onelittletag


Hello my friends!
I am a little behind in posting, but this is a card I made for the purple challenge last week on The One Little Tag Craft Challenge.   I just love the combination of purple and gold.  If you are following along, you may have noticed that.  Most of my purple themed cards or tags are using that combination.

For this card I used a Spellbinders die and cut out some gold foil board.  FYI, I get my gold foil board  at the dollar store.  Both Dollaramma and the Dollar Tree have the same foil board.  It comes in a package of 6 sheets 0 gold, silver, red, green and blue.  It's very handy at Christmas time!  I just wanted to mention this because I really like the foil card that I get there and it die cuts beautifully.  Sometimes a cheaper price doesn't necessarily mean an inferior product.   Anyways, I die cut my foil card and adhered it to some purple glitter paper, which I then adhered to a black card base.  It is sometimes difficult to stick to the glitter paper, so I ran it through my Cuttlebug just sandwiched between the plates to squish everything together in an attempt to make it adhere better, which it did. .  It almost made this look like a die cut inlay.  I really like the effect that created.  I added a few sparkly embellishments and left it as it is.  I will keep this in my stash and when an occasion comes up that this card will be suitable for, I will add a sentiment.  I think this is quite elegant with the gold foil details.
I hope you have enjoyed my latest card.  Thanks so much for stopping by to have a look!
Havve a great day everyone!
Kim xo

Saturday, 20 January 2018

"Love Tag for #onelittletag


Hello my friends!
I was gone for so long, and now here I am, back again so quickly after my last post!  Feast or famine! The theme for the One  this week was "Love"  I was really pleased with the outcome of this tag.  I would love to be able to take credit for the design, but I can't, it was totally inspired by a couple of different cards that I saw on Pinterest.  I thought the design was simple but so effective.  I really liked it and wanted to give it a try. I'm not 100% sure how those were created, but I did what I thought would recreate a similar look.  I used distress inks in worn lipstick and Barn Door as watercolours.  I "smooshed" them (very technical term!) on my craft mat and used an aqua brush to paint with them.  I didn't use watercolour paper, I used Strathmore Bristol, and it held up well.  I wet the card fist and added the colour..  Then I used a brush pen to write a long script "love".  Then I die cut a heart from a Spellbinders die in my stash to create a stencil.  I used the Barn Door ink to stencil the heart.  I flicked a little water around, as distress inks are water reactive.  Then I "Smooshed" some more ink on my craft ma, spritzed it with a little water and used my brush to splatter it on my tag (I just love splatter!)  Then I scribbled some black ink from my brush pen on the mat and did the same thing..  I mounted it to some heavy black card and called it a day.  Although I am considering mounting it to some red card as well to give it another slim border all around.  Hmmm...


This is the other tag I created this week.  I used some patterned paper from my stash that had the word "love" all over it.  I used some Spellbinders Celebrations Hearst die to cut some hearts out of some of the other patterned papers in the same pad.  I also cut the heaty out of the background and inlayed all the hearts. I used a Tim Holtz stencil with some Barn Door distress ink over the entire background.  I tried to use white ink first with the stencil, but it really didn't show up very well. Then added some white splatters with some watered down white copic ink.  I die cut the "Love" using a Recollections die out of Recollections card.  I used the same red card as a backer to my tag.

I hope you liked my tags.  I have some more ideas for the "love" theme, so I will be back soon with some more tags!
Thanks so much for stopping by
Kim  xo

Friday, 14 April 2017

Working Candy Machine Birthday Card


Hello my friends!  I thought I would share the fun birthday card that I made for my daughter.  It was a little late because I didn't have the supplies to make it in time, but i think she thought it was worth the wait.  Besides, she was away at University, so that bought me a little time!  It didn't takre long before the candy was gone and the message was revealed.  I used skittles in this card, but to be honest, they were a little bit big and got caught a few times.  I think I need to find some slightly smaler candies for the next one.


I did a second version while I was at it, just because it was fun!  I may keep this one for myself.  It is actually a work in progress because I need to add the candy before I can finish it.

Sue Wilson designed this Working Candy Machine Card and the components (and it does require a few) are from Creative Expressions.  I bought mine from Scrappin Great Deals.  Some of you may recognize the name from some of my previous posts. By the way, they recently moved and there was a glitch in their international shipping, but I caught up with them at Scrapfest and asked about that, because a couple of you had asked me, and I am happy to say they will soon be shipping internationally again, if they aren't already!  And for those of you here in Canada, shipping is certainly no problem, and free with orders over $100. (SGD does not know that I am plugging them, lol, but I am just letting you know where I get a lot of my supplies.  They have a lot of things I can't get at the local Michaels. I think I have developed a good report with them and I am comfortable ordering online with them.  It was great to finally meet them at Scrapfest!  I also order some things from Amazon.ca, but it usually takes a while for them to get new items)
 There is a die set...


some fomecore inserts...

some plastic "cups|. and handles

You will require all those elements to make one of these working cards.  There are 4 inserts in a package and 2 are required per unit.  I bought some fomecore to try and create some of my own inserts, but I wasn't very good at cutting out the apertures, so I think I will get some more inserts.  There are 6 cups in a package and 12 handles in a package.
I used some other dies from my stash and some sequins to embellish the card.
 I also wrapped some black tape around the edges of the the inserts before attaching the front and back so that the raw edges of the fomecore weren't visible.


I think that the next time I make one, I will die cut the the attachment that releases the candy out of matching card instead of white card.

I could also use this die to make a flat "non-working" card.  It is a really pretty image.  So I feel that I will get a lot of use out of the set.
Here is a link to Sue Wilson's video tutorial
Earlier in my post I mentioned Scrapfest,  This is an event that happens twice a year near Toronto.  T In the spring it happens in Kitchener (this seems to be the giggest event) and in the fall it is in Richmond Hill, which is a little closer to me.  I always look forward to it.  So, I will be posting my Scrapfest Haul, soon.  So if you like haul posts, be sure to stop back here soon.  Here is a link to a previous Scrapfest haul
And here are a couple of SGD hauls  SGD Haul
Well, I hope you enjoyed my latest post.  Thank you so much for stopping by!  Have an awesome day and a great weekend!  xo

Friday, 30 December 2016

A few more Christmas Cards - Using one basic layout


Hello my friends.  As I mentioned in yesterdays post, I have created a few more cards using the same basic layout as the card I did for my friend Margaret.  Each one is a little different and unique, but a lot of the work could be done at the same time, assembly line style.  All the stock could be cut at the same time, all the pieces cold be die cut at the same time and the assembly could be done at the same time.  What I like about doing some mass producing of cards is that it is a definite time saver .  What I'm not crazy about when it comes to mass producing cards, is that they are all the same and often one layer and fairly simple...sometimes.  Don't get me wrong.  There are some very beautiful and elegant, yet simple, one or two layer cards that are very effective (I should make a point of trying to make some of them, actually!).  If you have a lot of cards or invitations too make, that is certainly a wise way to go.  Bottom line, they are all still hand-made with love.  I like to go somewhere in the middle.  Using common elements is much more time efficient, but changing up the patterned paper, or colour of stock, the stamped images or the arrangement of the elements is one way to keep each card unique and personal.  Sometimes, the creation of one card will inspire you to create more because you like how it turned out.  This was the case here.  I liked the way Margaret's card turned out, but that card was very personal too her and her husband because of the dogs., so I made some changes.
These cards definitely still took  quire a bit longer than a single layer mass produced card, as each piece was distressed and inked and die cut or trimmed.  But they were quicker than designing four cards from scratch.  Often, I find that the designing of a card takes the most time.  Another good reason to recycle one that you like.  You can take one basic layout and keep it as simple, or make it as complex, as you like.


I don't typically follow a card sketch, but there are some great ones on-line that can get you going when you are stumped.  One that I have used is Mojo Monday.  They have loads of card sketches and do contests and challenges as well.  So if you find yourself stuck when trying to create a card, go back to some of your favourite cards that you have already created for some inspiration, or if you want to try something totally new, try finding a sketch on-line.
This is an example of a Mojo Monday card sketch, follow the link above to have a look at more sketches

Well, I hope this will be helpful when you find yourself in a creative card rut, which happens to most card makers at some point, and are looking for that little push.
Thank you so much for stopping by.  I am looking forward to sharing lots of cards and art and posts with you in 2017.  Please let me know in the comments if there is anything  you would like to see on my blog and I will do my best to make it happen.
Have an awesome and artful day! xo

Thursday, 29 December 2016

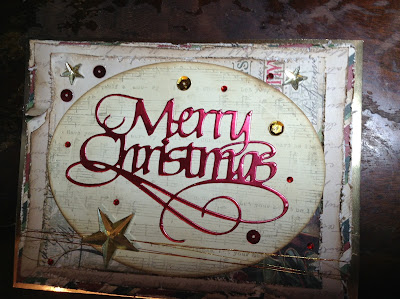
Merry Christmas Card


Hello my friends!  Sorry that I have been absent for a bit, but this season is such a busy time.  I hope you are all having a wonderful holiday filled with family and friends and lots of love.   My sister is requesting more Christmas cards, she is not ready to give up the season.  So for the next little while I am going to continue with the Christmas cards.  
This is one that I made using a similar layout to the last card that I posted.  I wasn't going to post this card, but Kerry (my sister) called me and said she was waiting for me to do a new post!  Some of you may have noticed me mention, Kerry.  She lives 3000 miles away on the other side of the country and my blog is one way that I can share my cards and art with her.  So, I decided to post this card, after all.  I also thought it might be helpful to show how you can take the same basic layout and switch it up a bit to get a different card.  I have done another card based on the same format that I will share tomorrow (it just needs a few final touches).

Thank you so much for stopping by!  Again, hoping everyone has a wonderful holiday and all the best for a healthy, safe , happy, prosperous and definitely a creative and art filled New Year!!!  xo

Sunday, 4 December 2016

Winter Wonderland II- A secon version of my latest Christmas card


Hello again my friends!  While I had everything out, I thought I would make some more cards.  I didn't have any more of the patterned paper that I used on the first card.  I decided to go with white on white.  I embossed the white card.  I used some distress ink to blend a background and splattered it with some water and Heidi Swapp spray.


Thank you again for stopping by.  I hope you enjoyed my second version of my Christmas card.  This is a card that has several layers, but would still be suitable for making multiples. I would love to know which version you like best! 
Have an awesome day! 


Winter Wonderland Christmas Card


Hello my friends!  Just a quick post today.  I am sitting here listening to some Christmas music and back to making some cards.  I thought I would quickly share my latest.  Some of you have been watching me make Christmas cards and tags all year and now I am finally "in season"!


Thank you so much for stopping by!  I hope you enjoyed this latest card.  If you like Christmas and holiday cards, make sure to check back in for some inspiration because I will be making more!
Have an awesome day!

Saturday, 2 July 2016

Tag 7-1 "Canada!"


Hello my friends!
July 1st is Canada Day.  So of course I had to make a tag for the day!
Some time ago I got a die at Michaels when they were selling off the Spellbinders dies (which, sadly, they no longer carry).  I had never seen the die before and I had to get it.


Just for the record, I don't believe I say "eh"! lol

I did not ise the word from this die set, I used another


This was actually a  relatively quick tag.  To be honest, I had been working on another tag for the day, that didn't really turn out (not everything works, but we must carry on!) If I can rescue it, at some point, I will share.

I hope all my Canadian friends had a wonderful and safe holiday, and I hope everyone has an awesome and artful day!  Thanks for stopping by