Showing posts with label foil. Show all posts

Monday, 3 October 2016

Tag 9-25 "Merry Christmas" with foiled die cut elements


Hello my friends!  I am back to creating Christmas cards and tags,  This tag was created using some of the foiled and die cut elements that I showed in my previous post on foiling die cut images without toner paper .  This is similar to a tag I have done previously, but this time I foiled my die cut elemants instead of die cutting foil board,  so just another option.

I started off this tag with some distress inking using |Picked Raspberry" and "Broken China"  I used a torn sheet of paper to mask the snow hills.  I flicked the tag with some water because distress ink is so water reactive and I just love the look.  I also flicked on some Heidi Swapp sheer spray to give the look of some snowflakes.


Once I finished my background, I mounted it to some silver foilbaord and then to some Recollections Shimmer card, leaving a small border on each. 
I used a Tim Holtz die to die cut my trees from card that I had prepared for foiling, and an Yvonne Creations die for the sentiment.  

 Then I foiled the die cut pieces.  Once they were foiled,  I assembled my tag.  i used Artist-tac adhesive sheets.  These have small adhesive dots that adhere to any paper you want to stick when you place  your item between the adhesive sheet and the liner and burnish.  I find this awesome when I have an intricate and fine die cut shape that is difficult to glue.  I use these sheets all the time and they last for quite a while.  I get a lot of use out of one sheet.  They come in a package of 25 and I thik I paid about $25 for the package, so they are a little pricey when you have to buy a whole package, but I have found them well worth the money.  When I run out (which won't be for a long time!)  I will purchase another package.  I think I got this package at the beginning of the year, I use them for almost every tag I make, and I'm on the fourth sheet. (just to give you an idea).


Well, I hope you enjoyed today's tag.  Thank you so much for stopping by to have a look!

Even more foiling awesomeness! Foiling die cut images (No toner paper required!)


Hello my friends!  I am back with some more foiling awesomeness!  This is just a quick post that is kind of a take-off from my previous foiling posts Part 1 and Part 2  using one of the techniques I was experimenting with.

It is very easy to foil die cut images without having to get any toner paper, use a laser printer or a photocopier.  No toner required!  Using a product that most crafters have on hand, Mod Podge, we can create our own reactive paper or card.  You could also use some of the other mediums that I tested in the other foiling post, but today, I used Mod Podge.  I will probably do some more experimenting to determine which I feel gives the best result, but they should all work.


All you have to do is cover some cardstock or paper with the Mod Podge,  Take an extra minute when you do this to ensue that you have a nice even and complete coverage.  I rushed it a bit and you can see the brush strokes in some areas and there were a couple of pinhole spots that I guess I didn't completely cover.  Admittedly, it will not be as completely smooth as a toner sheet, but it's pretty good and personally, I don't mind a bit of texture. Let it dry and die cut your images from the prepared card/paper.

Once you have your die cut piece, (the mod podge side must be the top), lay your foil over it, shiny side up, and run it through you laminator or Minc.. Make sure you don't have any mod podge on the back or it will stick to your carrier.


I painted several sheets at once with the Mod Podge so that I will have some on hand and won't have to do that step and wait for it to dry each time.
I also wanted to take this opportunity to mention something else that has come to my attention.  My friend, Mary, was using a heavier card and was having some difficulty getting the foiling to work with her laminator.  Possibly with the thickness of the card and the copy paper carrier, the foil wasn't getting hot enough.  Mary used tissue paper as her carrier, instead of copy paper and it worked.  So if you are having a similar problem, you may may also find that tissue paper is a good solution as well.  Thanks Mary!

And thank you for taking the time to visit!  I hope you found this little tip helpful.  Please share it with anyone that you think may want to give it a try.  
Have an awesome and artful day!

Sunday, 25 September 2016

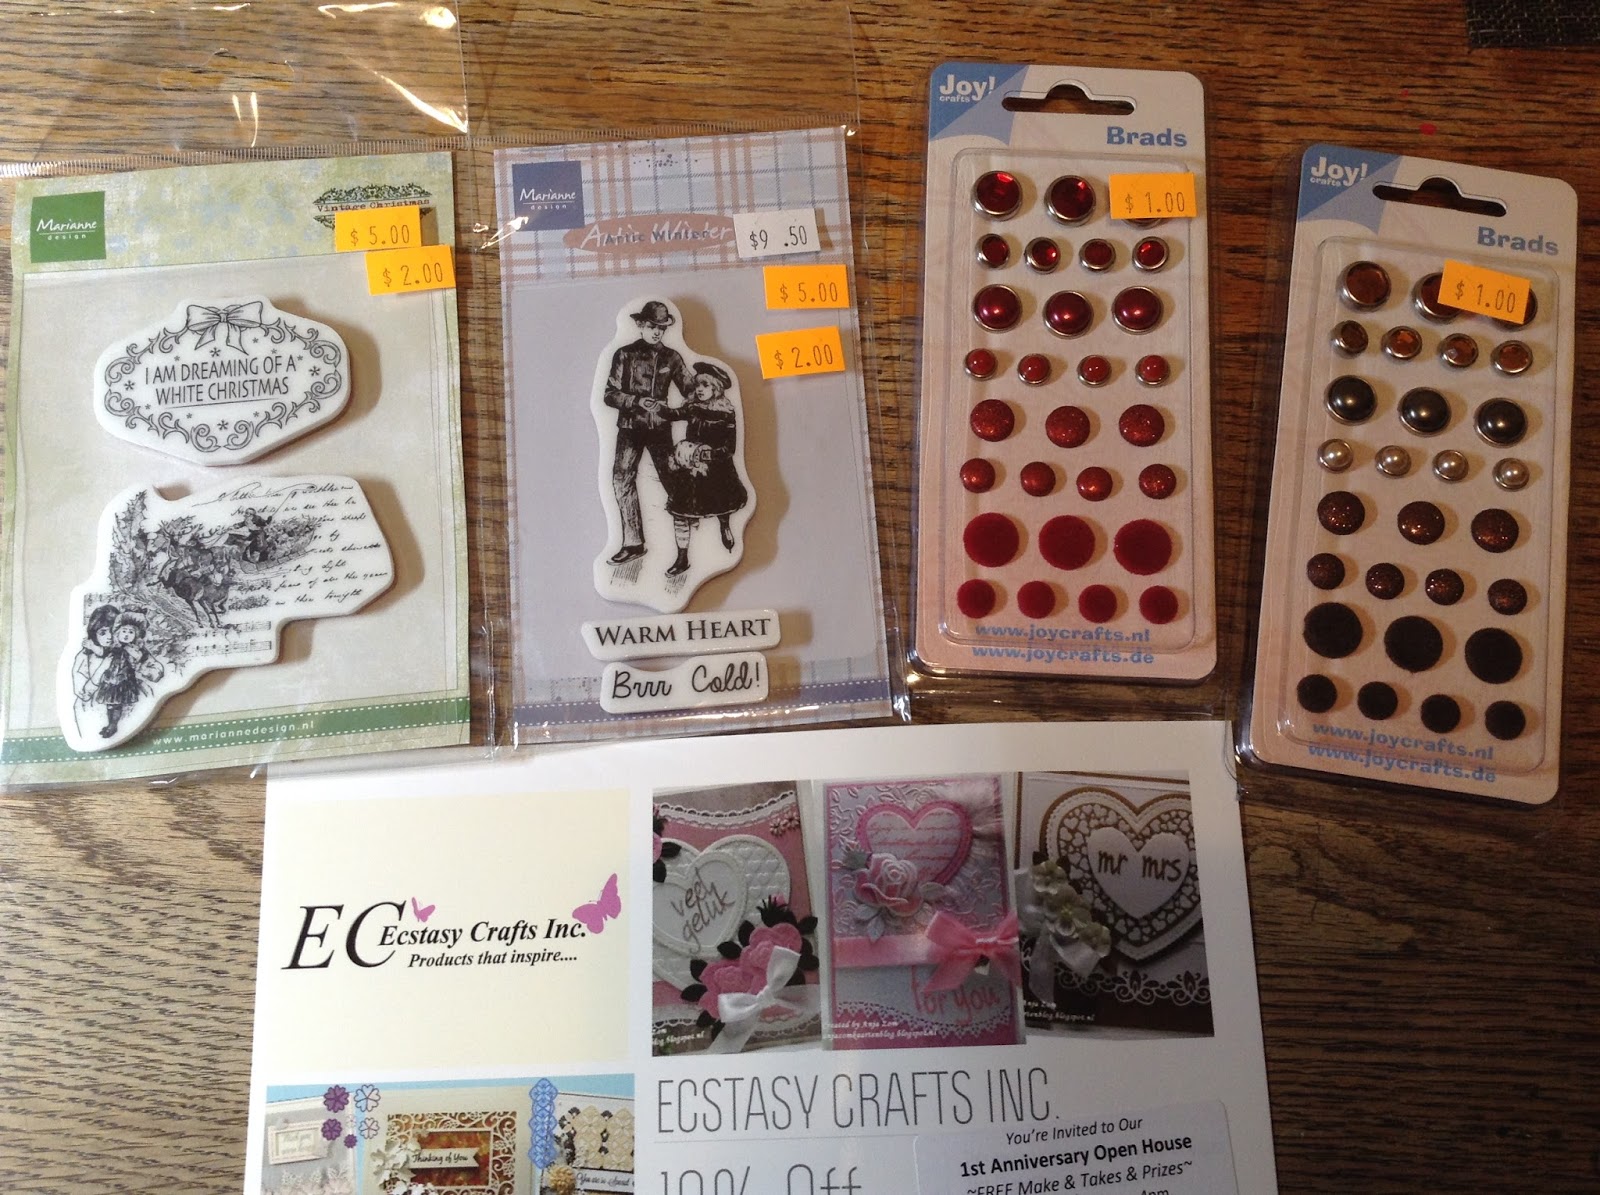
Scrapfest Craft Haul!!!


Hello my friends!  Today was a fun day that I have been looking forward to all year!  SCRAPFEST!  Scrapfest is an event where several vendors from across the country get together in one place and set up shop for a couple of days.  Lots to look at, and lots of make 'n' takes. They also have a 2-day crop which is always busy and always sounds like a lot of fun, but something I don't participate in.  I have to admit, I am a shopper, not a cropper.
So my friend Lynn and I, were up early and on our way to Richmond Hill, with a quick Tim Horton's stop on the way.  Lynn has more restraint than I do when it comes to craft supplies, but she loves to participate in the make 'n' takes, and made some great things today.  We ran into our  friend Mary there as well.  We always make a day of it and end with dinner.  Lots of fun!
I have decided to share my treasures with you.  I did say in one post  that I don't typically do hauls, but since this is my third one, apparently I do!  I will not post every time I buy something crafty or artsy, but it is fun to share the special purchases.  Now, some of you may think this is a little excessive (and I guess some of you won;t), but this is an event that I save for.  It happens in the Fall and in the Spring, at two different locations.  The Spring Scrapfest s in Kitchener, On. and is the larger show but I don't usually make it to that one.  In the Fall, the sale is in Richmond Hill, On, a little closer to home.  I save up for the event because it's an opportunity to find some treasures that aren't usually easily available.  Let's face it, Michaels has a limited selection.  There are not a lot of Scrapbooking and craft stores around and with my vision, I cannot drive, which means sometimes Michaels is my only store
.Anyways, here is my haul, I hope you enjoy!


This store is a little out of the way for me, but if I am out that way, I will definitely visit.  Stephanie, the owner, came out to our club and did an awesome demo on mixed media with a make'n' take.


This stamp set was from Class Act from Oshawa, On.  One store that isn't too much of a hike from home.  I have been there a few times.


I had barely gotten in the door when I hit this booth.  She had Unity stamps, which I have never had an opportunity to get before, which was great.  She also had several LaBlanche stamps and I just loved the vintage images!  She had a lot of other things as well, but I was fixated on these.   There were several that I liked, and all the ones I chose were half-price.!  But I was reluctant to buy too much at the first place I visited.  I bought a few things and the vendor was kind enough to hold the rest for me.  I totally would have understood if she couldn't, but she did, which was super kind.  I did come back and get what she held, plus a few more!  Unfortunately, this store would be a bit of a hike as well, but if I am ever out that way, I will definitely visit here, too..


I just love that "ugly sweater" die!  So you can look forward to seeing it soon.


Another store that I have made it to, once before, and will get to again!


I was excited to find some foil!  It is not impossible to get, but not readily available and I have to purchase it on-line, usually.  So, happy find!


These dies match a stamp set I got last year with Local King Rubber Stamp from Vancouver, BC


I had a lot of fun, but I have to admit, this show seemed smaller than usual and I missed some of the regular vendors.  I'm hoping to make it to Kitchener in the spring.
So after the show, we headed home.  We went to Milo's for a nice Greek dinner and after that, on a whim, we stopped at Value Village (a second -hand store) and I found some vintage books whose pages will make it into some of my creations
(yes, that is vintage Nancy Drew and The Bobsey Twins!)

All in all, a great day!  Thanks, Lynn!
And thank you too,  for sharing in my Scrapfest fun.  You will beseeing some of these items soon in some new creations!  Have an awesome  day!

Friday, 5 August 2016

More Foiling Awesomeness!


Hello my friends!  Are you a fan of foiling?  Do you love that shiny goodness?  If you do, you will be interested in this post.
I was watching videos on You Tube the other night and I ran across one that mentioned foiling.  I am always looking for new foiling techniques, so I was anxious to watch it  And I am glad that I did.  Just for the record, in case you ever visit my post and read this, Kate Palmer, it is your fault that I went to bed so late last night!  But all for a good reason!  Kate was doing some experimenting with some Heidi Swapp mediums.  I didn't realize that now there is a foil reactive paint and a reactive spray.  She was testing how these mediums worked with foiling over some sprayed backgrounds.  Here is a link to Kate's video She referred to watching some videos by Heidi Swapp and discovering that the Heidi Swapp metallic embossing paste and her metallic screen ink were also reactive with foil.  I don't know why it never occurred to me to subscribe to Heidi Swapp's channel to get info on foiling, but I have corrected that now.  You don't have to own a Minc to get some useful information, it all works with a laminator  as well, which is what I have.  I didn't have the spray or reactive paint, but I did have the embossing paste and I also had the screen ink, purely by accident.  I thought I was buying embossing paste and later realized that the great deal I had gotten was for screen ink NOT embossing paste, lol.  I had resolved to use it in a similar fashion as the paste, but this was great news if I could use it for foiling. The gold ink and paste were specified, which I didn't have, but I thought I'd give what I had, a try.. Who needs sleep anyways?  My mind got going and I thought, I wonder if any  paste would work, I do have other gold embossing pastes, so I thought I'd try those as well.  Then I thought I'd try some gloss medium, too.


I had some Gelli prints that I had cut down to try and make some ATCs, so I thought I would use them to test the various inks and pastes.  I ran the various mediums through a Tim Holtz burlap stencil


I got out my laminator and my foiling scraps once they were all absolutely dry.  I just use a folded piece of copy paper as a carrier.  I started feeding them through the laminator.


I was so thrilled to discover that everything I tested, worked!  The gel and the embossing paste seemed to work a little better than the screen ink, but I will still be using the ink for foiling, too.  This just opened a new foiling world for me! 

I used Heidi Swapp embossing paste through a stencil on my tag today, and it worked beautifully


 I have been doing some experimenting with toner to try and make something like a toner paint  and ink, with some success,  but now this may take me in a different direction.   I am wondering if I actually need toner. at all .   So I have some more ideas and experimenting to do!.  In the meantime though, I thought I would try  using some other pastes and mediums  So stay tuned, and tomorrow I will share the results of the other products I am trying to see if they are also reactive with foil. .  I am an artist that loves to paint wit a lot of texture, so I have several different pastes and mediums to try.   Hopefully, there may be something that you already have on hand that will work for you

Thanks so much for letting me share some foiling fun with you.  If you think there may be other foiling fans that will find this useful, please share! 
Thanks again and have an awesome and artful day!

If you enjoy foiling, be sure to check out some of my other foiling posts!

Tag # 8-1 "Transform" #onelittletag (with a little foiling!)


Hello my friends!  Well, tonight I made a tag for the One Little Tag Craft Challenge. The prompt is to use sprays and stencils.  I wasn't going to worry about the prompts for the time being, but this was one I liked!  So this tag was created using a background made during my play with sprays and stencils.  I also used a new foiling technique (which I will be posting!) and punched a butterfly out of gold foil card.  As usual, I mounted my tag to black card.


Thanks so much for stopping by and having a look at my tag.  If you love foiling, as I love foiling, pop back for my next post for some more foiling fun!

Monday, 1 August 2016

Tag 7-26 "Don;t Forget to Fly" A Steampunk Dressform tag #onelittletag


Hello my friends!
Today I have decided to make some tags.    I started my first blog ever, this one, January 2nd of  this year.  At the same time I started my first ever FB challenge, .The On Little Tag Craft Challenge  Some of you who have been following me for a while may already know this, but those of you that have more recently joined me, won't know this.   The idea behind the challenge is to create just one little tag a day, even if you just write a word on a tag, it doesn't have to  be perfect or even good.  The propose is to inspire you to be creative every day.  I must tell you, it really works!  I have been very delinquent with my tags.  I was doing really well until I went to Florida in March.  I  have created some tags since then, but not keeping up as I had been.  As time has gone on, I have gotten more and more behind.  By my calculation now, I am 85 tags behind.  Will I catch up?  I don't know, perhaps some of them.  But I am not going to worry about it.   Fortunately, I have still been creatively inspired.  I have been working on other things, but I do think about making tags, which I do enjoy.  So, I am going to attempt to get back to it.  Maybe not every day, but more frequently than Ii have been.  
Often there are prompts for the tags each week.  These are not mandatory, but designed to help prevent "tag artist block", it can be hard coming up with a new tag every single day.   I am going to ignore those prompts for now and just make the tags that I feel inspired to make.  My challenge to myself today was to use backgrounds and die cut pieces that I already had in my stash.  I have a lot!  I have created several backgrounds and whenever I am die cutting, I always cut extra.  So I have a pretty extensive "stash".
 I will forewarn you, I will have a few posts today, I have been busy!

First, I grabbed some die cut pieces from my stash.  I had the idea some time ago, that I would like to do a sort of steampunk dress form and had already worked on some of the die cut pieces.  So I decided to continue with that idea

All of the pieces I ended up ising had been cut with Ti Holtz dies.  I had adhered aluminum tape to card before cutting the dress form, and then embossed it with a Tim Holtz embossing folder.  I cut away some of the dress form to make it work for my design.  The bodice (?) was also made from a dress form that I cut up and embossed.  The skirt (which was originally a bird cage) was also embossed.  Once embossed, I ran the silver ink across them lightly to pick up the embossed areas..  I had done all  of this ages ago.  Today I edged the wings (which were not part of my original plan) with silver ink.  Then I assembled my dress form.  I already had the sentiment, a Prima stamp, which inspired to rest of the tag.


Ii had selected a few different backgrounds and wasn't sure which one to choose, so I tried them all out.


I chose the green, which was actually a surprise to me because green is definitely not my "go-to" colour!  I used mu Hero Arts stamp, one of my all-time faves, with my silver ink in the background and also on the little butterfly I punched with my Fiskars punch.


All that was left to do was assemble my tag and mount it to black card.


Thank you for joining me today.  I hope you enjoyed my tag and will enjoy then next few I post tonight!


Monday, 20 June 2016

Tag 6-20 "Happy Birthday"


Father's Day fell on my sister's birthday this year, which also happened on the day she was born.  It also was my parent anniversary.  Busy day!
So this tag is for my sister.  She is about 3000 miles away on the other side of the country.  I haven't seen her for several years now, though we speak often. But I miss her.  I was happy to hear that she had a wonderful day with my nephews  
Happy Birthday, Kerry!  Love and miss you xoxo

I made the larger flowers from scraps of patterned paper I had in my stash, as well as the butterfly. I trimmed the tag out of card I have on hand and the foiled die cut with the sentiment is the "waste" from another tag I did. I punched some leftover vellum and added some lace pieces from my stash. I hope she likes it!

Sunday, 19 June 2016

"Happy Father's Day" Tag 6-19 #onelittletag


Welcome my friends!
Today's tag is for my Father for Father's Day.
I cannot express with words how much I love and appreciate him.  One day a year is certainly not enough to show the gratitude I have for what he does EVERY day for my daughter and myself.  
We are blessed to have a very special "Papa".
Love you Dad!


Of course I had to add a bit of foiling! I stamped the foiled areas with some toner paint I have been working on making and will share with you when  I get it figured out.

Happy Father's Day to all the good father's out there, that love and cherish their children!