Thursday, 28 July 2016

Trust the Magic - A Mixed Media Girl


Hello my friends!  Today I am sharing another whimsical  mixed media girl.   My sister wanted me to do a fairy girl, so she is a fairy. (I love fairies, too)  I think I am going to do a series and make some cards with them..  This seems to be what I am enjoying for the moment!
When I started this art project, I had no idea what I was going to be doing.  In fact, I was doing various backgrounds to choose one for my first attempt at  Mike Deacons "Mission Inspiration|" (which I still haven't finished, but will be posting soon!)  So I did things in a specific order on all of them to start with, since I wasn't sure which one I was going to use.


We were supposed to add colour with a baby wipe, add some tissue paper or napkin fragments and then cover with a thin coat of Gesso..  this is where I veered off coarse.  The next step was to do some embossing paste through a stencil and then add two opposite colors.  I used my sprays and was starting to add to use opposite colours, but got carried away with the sprays!  I liked the direction this was going but knew that it wouldn't be for the challenge.  I actually ended up with several backgrounds that I really liked (and that you will eventually see) as well as my page for the mission. So it was a productive day at art last Wednesday.


Tonight, this is the background that I chose to use and added some embossing paste through some Tim Holtz stencils (he has such cool stencils!)  I actually did some embossing on all of the backgrounds, since I had everything out, but I did this one with intent!


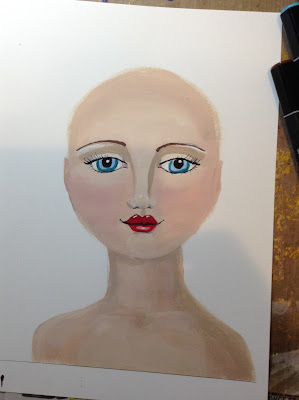
Then I got one of the copies of a face I had sketched on watercolour paper.  I decided I wanted to start off with paint on this one. First I added in the outline of the face and neck.  I used acrylic paint (craft).  This is the first one I have done with acrylic paint.


I added in some details with a black  marker.


Then I copied it, slightly reduced on white card and added in some more details.  I knew this was too big for my project, but with my vision issues, it's a little easier to work larger.


I copied her again, much small, and cut her out.  I cut out some hair and her dress from some scraps of patterned paper in my stash.


I needed to add some wings, so I scrbbly sketched some on some vellum with a gold Sharpie.  Then I thought I would use the rubber cement foiling technique.  So I used the brush provide in the glue jar to roughly "paint" around the wings, let it dry and then put my deco foil on top and gave it a rub.


I edged her hair with my gold ink and her dress with some distress ink.  Then I assembled her.


I added her to my page, outlined her with a PITT pen, added my sentiment (a Prima stamp)  I punched out some butterflies from some gold foil paper. 


 In retrospect, I may not have added them, or so many,  But too late know, so I outlined them to give them more definition, since they weren't going anywhere!

I hope you enjoyed todays post.  Thanks so much for stopping by and letting my share my efforts with you.  Have an awesome and artful day!


Monday, 25 July 2016

Autumn - A Painting


Hello my friends!
Today I am featuring another painting from my blog gallery.  This painting is 48" x 36" on gallery style canvas.  It is painted in acrylics and is very dimensional.  The trunk of the tree has been created with modelling pastes and impasto gel.  I have a love of metallics and have used a lot of metallic paint on this canvas.  The leaves were made by creating acrylic "skins" with metallic paint cut into rough leaf shapes and adhered with acrylic medium.
Thank you for stopping by and I hope you enjoyed my painting today.  Have an awesome and artful day!

Friday, 22 July 2016

A white paint pen / mark making comparison


Hello my friends!
I was doing a comparison of my white paint pens and thought it may be of some interest to some of you.  So, today I am sharing my results.
I have a couple of Posca paint pens.  These are not readily available.  In fact I don't personally know of any where local where I can purchase them, so I ordered them off Amazon.ca.  They took forever to get here and were a little pricey.  But I have to say, they are really good, probably the best that I have tried.
I purchased the Sharpie locally, I'm not sure where, probably Michaels or DeSerres.  They are easy to find.
I found the Daler Rowney paint pen at Walmart yesterday.  It came in a package of two, one white and one black.  I t was $4.97 for the package.  I was very pleasantly surprised wit these pens.  I had not seen them before, but am glad to find a paint pen that is locally available.  The Decocolor paint pen was purchased at the Creative Festival I attended a couple of months ago in Toronto.  I got three of them and was assured by the booth owner that they were great and would work on anything.  I will let you judge the results.
I bought my Pitt pen at Michaels or DeSerres.
I got my Uniball pen online and my Gelli Roll gel pen locally.
The first substrate I tried them on was black card


The Posca pens were great, the Sharpie soaked in to the uncoated card quite a bit.  The Daler Rowney pen worked quite well.  The Decocolor paint pen almost disappeared into the black card.  It actually shows up better in the photo than it does in reality.  The Pitt pen was okay and the Uniball and Gelliroll gel pen were fine on black card.

I decided to coat the card with matte and gloss Mod Podge, as most mixed media pieces would be coated with this or some sort of medium.


They all worked fairly well once the card was coated.  Interestingly, the finer Posca pen splattered a little bit when writing over the texture of the brush strokes.  The Decocolor pen worked much better, but is still somewhat translucent. The PITT pen is not super opaque.


As you can see, the results on the gloss Mod Podge are the same as the Matte  Mod Podge.

I also had an extra fine Sharpie paint pen, but disappointingly, I could not compare it because the pen would not write.  The paint did  come out, but the pen just did not work.  I have to mention that I have found that to be the case with other Sharpie paint pens.  They work great the first time I use them, but when I go back and try use them a second or third time, they often don't work well.


So in conclusion, this is what I have found.  To me, the Posca pens were the best, although I was a little disappointed in the splattering of the fine pen on texture, because I know any of my mixed media projects will be textured and it would be nice to have a fine pen for writing.  I am hoping that it may "calm down".  My second favouite, for my purposes, is the Daler Rowney pen that I just discovered.  It works well and it is reasonably priced.  I wish it came with a finer nib, but this will probably be my "go-to" pen as it is economical and available locally.  I will be on the look-out for a finer line paint pen that is more easily attainable that gives good results.  I will let you know how that goes  I will not purchase the Decocolour pen again.  I love my PITT pens and will always have a use for them, so I will always keep a white one on hand.  Lastly, I really like my Gelli Roll gel pen and my Uniball gel pen.

I hope this has been of some help to those of you who may be wondering what kind of white pen to purchase.

Thanks for stopping by, have an awesome and artful day!


Monday, 18 July 2016

Be Awesome - A Whimsical mixed-media Girl


Hello my friends!
I thought you might like to see what I did with my whimsical girl.  As I mentioned in my earlier post, I thought I might cut her out and use her on a mixed-media piece.


I started off with some Canson watercolour paper.


I started off with some pink craft paint that I applied with a baby wipe.  To be honest, this was originally starting out as something else that ended up being the background for my whimsical girl.  That's why I was using craft paint.


Then I collaged on a few pieces of a pretty napkin.  Then I used a light coat of gesso to push it back a bit


Next I added some gold embossing paste through a couple of stencils.  That Tim Holtz stencil is my absolute favourite!


Then I added some sprays.


I cut out my girl, edged her with gold ink  and adhered her to my page.  I added some more embossing paste on top of her to tie everything together.  I also added some more spray.  Suddenly she had little purple freckles!  I thought I had covered her, but I didn't want to end up with a harsh line, and it turns out I didn't protect her well enough.  Now, I have a confession too make.  Because I wasn't initially sure what I was going to do, I made a copy of her.  So the truth is, the copy ended up with the freckles.  Which, having freckles myself (although not purple), I don't mind. Then I printed out my words, edged them with gold ink, then black archival ink, and added them to my page.


Then I got out  one of my PITT pens and some stamps and ink for some finishing touches.


Thanks so much for stopping by, I hope you enjoyed your visit!  Have  an artful day and 
BE AWESOME!

Saturday, 16 July 2016

The Caterpillar - A mixed media painting


Hello my friends!
Today I am featuring another painting from my gallery.  is called "The Caterpillar" and I am fond of this creation.  I wish I had a better photo of it to share with you. The sentiment struck a chord with me and was the inspiration for the painting.
This was done on a 12" x 24" gallery style canvas.  I used a variety of different brands of acrylic paint.  I first painted the background blue, and then, keeping in mind where I was planning on putting the butterflies, added in some more colour.  I also did some mark making,  drips, used some stencils and stamps with archival ink.  Then I created a mask for the large buttterfly using a die I had and some low-tac shelf liner.  I added the black into the background, fading it out somewhat at the edges with another stencil.  I used the same colours that I used to create the large butterfly to stencil in the parade of winged beauties travelling up the canvas.  I used a white paint pen to loosely outline the butterflies.  After adding a few more details, I added my sentiment, mounting each line onto black card and finished it off with a spray varnish.
Thanks for stopping by, I hope you enjoyed todays post!  You can see a few more of my paintings in my gallery if you are interested.  Have an awesome an artful day!

Thursday, 14 July 2016

A Mixed media Birch painting


Hello my friends!
Today I decided to highlight some of the paintings that are hidden away in my gallery.  This is a mixed media painting I did a couple of years back.  I used acrylic ink in the background and acrylic paint to create the birch trees.  I love the vibrancy of the inks against the birch trees.  I used water in a spray bottle to move the inks and let them dry thoroughly before painting the tress.  I did this in layers, inks, trees, then some more ink and some more trees to create the depth of the painting.
Thanks for looking!  I hope you enjoyed. Have an awesome and artful day.

Whimsocal Face - Mixed Media Girl


Hello my friends,
I just love the look of the beautiful, whimsical mixed media girls and have wanted to create some myself.  I am so inspired by the many talented artists on social media, so I'm sure I have picked up bits from several of them in my efforts.  Most recently, I was having a look at Jane Davenport's book, "Beautiful Faces".

  Some of you may already know this, but for those of you that don't, I have a vision impairment, which makes drawing is a real challenge for me.  I haven't made many attempts, although, I have been dipping my toes in the water.  You may have seen my "You are my Sunshine" tag that I posted a while back.


One of the members of our art group was doing a demo today on dropping colour into faces with watercolour.  This inspired me to do a few drawings last night.  I copied my sketches onto watercolour paper, regular cardstock and copy paper.  Unfortunately, the ones on watercolour paper came out with toner all over them.  Maybe I need to used an anti static sheet on the paper before I run it through the laser printer?  I will try that next time.  I wanted to have a few to do some colouring practice with.


I did take my watercolours to the club in case I wanted to give it a try.  I am NOT a watercolourist!  But I do enjoy stretching my boundaries.  However, today was not the day for watercolours for me. Since the copies I made on the watercolour paper had toner on them, I decided to used coloured pencils, primarily, which I had also brought.  I used Prismacolor and Derwent coloured pencils  This is another medium that I don not use a lot.
I was pretty happy how she turned out considering my inexperience.  I think I will probably cut her out and add her to a canvas, or perhaps my first ever art journal page!  I will share the finished project. 


I did another one that I wasn't as happy with, and I will share that as well in the interest of just being real!


Her face got a little dirty and, in all honesty, it was late and I got a little careless once I realized that I wasn't really happy with it.  Maybe I will be able to rescue her with some paint or something.

Thanking so much for stopping by and having a look, always very much appreciated!  Have an awesome and artful day!


Sunday, 10 July 2016

Fun with Alcohol Ink


Hello my friends!
Yesterday my friend, Margaret Brackley, taught a workshop at our art club (Ajax Creative Arts) on Alcohol Ink.  Everyone had a great time and everyone went home happy with some beautiful pieces of art.  That's one of the things that everyone loved, they got to go home with finished work, but they didn't have to bring anything with them, everything was supplied!  I thought I would share some of the fun with you.


Above are a few samples that Margaret brought to show every one.


We all did a couple of different sized tiles, and experimented with Yuppo paper.  Here are some pictures of what the ladies created.  Hard to believe most of the had never used alcohol ink before!


We all did alcohol ink on glass pendants.  These photos do not do them justice.  Every single pendant was gorgeous!


What a great workshop with a great group of ladies!  Thank you for looking and letting me share some of the fun with you!  I can't wait for the next alcohol ink workshop where we will explore some more ways to use alcohol ink!
Have an awesome and artful day everyone!