Thursday, 26 January 2017

Alchol ink on glass pendant video tutorial by Margaret Brackley


Hello my friends!  I have a special treat for you today.  My alcohol ink workshop posts have been some of my most popular with all of you.  What's not to love about those beautifully vibrant inks.  One thing I have mentioned is how stunning the glass pendants always turn out.  My friend, Margaret Brackley teaches the alcohol ink workshops that I have been featuring on my blog.  She has started a YouTube channel and I am so happy to share her first tutorial!  If you enjoyed looking at the photos from our workshop, you will love this video.  If you like alcohol ink, you will want to subscribe to her channel because she creates wonderful works of art  using a variety of techniques, and this is just the first of more tutorials to come!
Thanks so much for stopping by today and I hope you check out Margaret's video.
Have an awesome day everyone!  xo

Monday, 23 January 2017

New "Tags" page and up-dated "Paintings" and "Cards" pages


Hello my friends!
I don;t have a post for today, but I did want to let you know, for those who may be interested, I have added a new page to my blog, "Tags".  I did many tags last year for the One Little Tag Craft Challenge, all of which are posted on my blog.  I thought I would do a page of tags so that it could easily be scrolled through for anyone who likes tags or is looking for some tag or card inspiration.
I have also added some photos to my "Cards" page and my "Paintings" page.
Please have a look if those are of interest to you.
Have an amazing day everyone!  xo

Friday, 20 January 2017

Stamperia Demo and Haul - I thought it was only available in Europe, but it's available in Toronto!!!


Hello my friends!  
This is a post about another product that I am so excited about!  I had seen a few videos using  Stamperia products on YouTube.  I knew it was a European company (from Italy) and I figured I would never get my hands on any of it.  Some of you that have been following my blog may know that I belong to a few different art groups and associations.  The club I am most closely involved with is Ajax Creative Arts.  It is my job within the club to organize demos and workshops.  One of the other members of the group, Lydja, approached me  a while back and told me that she worked with  someone who would be interested in doing a workshop or demo at our club.  I spoke to Nahla on the phone and as she was describing the product, I discovered it was Stamperia!  I was so excited!  As far as I know, she is the only distributor, at this time, in North America!
So on Wednesday afternoon, Nahla and her lovely daughter came to our club to introduce us to the Stamperia line of products.  The catolouge is quite thick, this company 
offers a multitude of products.  They have paints, sprays, pastes, gorgeous collage and decoupage papers, stamps, stencils, transfers, transfer gels, a wonderful crackle paste, patinas, and the list goes on and on.
These products can be used for mixed media, art journallung, crafting, decorative painting, home Decor, fabric painting etc. etc.  etc!
Nahla brought a few samples of some finished projects and did a great demo for us using a variety of different products.  We only had a couple of hours, so we steered the demo in the direction that we thought would appeal most to our artist members.  but there are so many more things for the creative soul to try.  I have added a couple of links below to videos I saw before I had even spoken to Nahla.  There is a mixed media canvas and an art journalling page, some of the things I was interested in.  But I encourage you to visit the Stamperia website, there is a link above, and search Stamperia on YouTube for many great videos, if you are interested.
Please enjoy some photos from our demo.  I had asked Nahla if she could bring in some product that we could purchase.  What you see in the pictures are just a tiny sampling of what's available.  We had a lot of fun looking through the beautiful papers, stamps, stencils, paints, pastes etc.  I was surprised were reasonable ans comparable  with similar products more widely available here..  I guess I just assumed that because they were imported and shipped from Italy, there would be a higher price point.  Sometimes it's nice to be wrong! 
We will be planning a workshop soon! (which I will also share)

Please excuse all the mess in the background.  Our art club also shares space with a theatre group who uses the space as a prop drop-off ground (please also excuse my annoyance, lol)


We took a little break to allow for some drying time and had some fun looking through the products that Nahla brought.


These are the goodies  that I purchased (to start with!)


This crackle paste is different finish than any of the others I have tried, so I am looking forward to trying it.  It might be fun to combine it with different  crackle mediums throughout a canvas for some different textures


Here is a mixed media canvas video by Nicoletta Zanella using Stamperia products.
Here is an art journal page using Stamperia products by Vicky Papaioannou who's work I just love!

Well, Nahla casually mentioned that she was heading to a trade show in Arizona this weekend.  I'm so jealous, she is off to CHA!!!  That is one show I would love to go to. I hope she has a wonderful time, I'm sure it will be a lot of fun!

Thank you so much for stopping by!  i hope you have enjoyed hearing about our demo and will check out Stamperia.  Have an awesome and creative day!  xo

Thursday, 19 January 2017

Jane Davenport Haul!!! and Happy New Year!!!


Hello my friends and Happy New Year!  Things have been a little crazy around here and I can't believe t's already the middle of January, and this is my first post of the year..  I hope everyone is great, settling into 2017 and anticipating lots of wonderful things this year.  I don't really make "resolutions", but I do have a mental list of some things tat I'd like to try this year.
Last year was a year for several new things for me.  I have to admit, I'm a little "old school" when it comes to technology, but I'm trying!  I started this blog last January, my first and only (so far!).  I still don't really know what I'm doing and have a lot to learn, but I am having so much fun with it.  I love sharing with all of you.  I love seeing that people from all over the world have stopped in to have a peek at what I have been up to.  I think it is so amazing to feel connected to people in so many countries.  My original intent with this blog, was to share my art and cards with my sister, who I haven't seen for several years and who lives 3000 miles away.  I had text Kerry some photos of of cards that Ii had been making and she was interested in trying some as well.  I thought this would be a great way to craft together.  We could speak on the phone and them I could show her what I was talking about in my blog and share different ideas and techniques with her.
I also joined some FB groups for the first time.  The first one i joined was  the One Little Tag Craft Challenge, (which is continuing this year, in case anyone is interested in checking it out)  So I made tags for the first time, which I really love making.  The idea behind the challenge was to try and make on little tag a day, just to stimulate your creativity.  Once a day isn't always possible, but that doesn't matter.  To be honest, I haven't made a tag yet this year.  I started off really well last year but sometimes life gets in the way of art projects, or sometimes other art projects get in the way of tags.  It still didn't matter, you can jump in and out as much as you like.  But I have to tell you, it really kept me inspired.  So you will find many many tags on my blog.  I also joined some great Google communities.  I have found that people are so kind and supportive and it is so motivating.  So thank you to any of you who may be a part of the FB groups and G+ communities I am in.  I will share links at the end to some of those wonderful groups I participate in.
I know I am a little slow with my technology, but I have set up an Instagram account.  I haven't posted anything yet, but once I get going I will share that as well. So that was one thing I wanted to do this year. Another goal this year is to do some crafting videos, so hopefully I will have some of those to share on my YouTube channel as well.  I have never done any art journalling, that is something I'd like to do this year.  There are other little creative challenges I think I will be trying throughout the year as well.
I hope you are inspired to try some new creative endeavors this year.  I would love to hear some of the ideas on your list.  It might spark even more new interests for me, or others that may read this.

NOW, without further adieu, let's get to Jane Davenport!!!  I was so excited to see so many YouTube videos showing that her product was now available.  Then I was disappointed, because there was nothing at my local Michaels (I believe this is exclusive to Michaels) and when I searched Michaels Canada, nothing came up for Jane Davenport.  Alas, I thought, it must only be in the US.  Well, I did not give up my search and I am so happy to report that the Jane Davenport line IS also in Canada, although it is not at every store.  I was also very pleased to discover that they were not a crazy price point, (especially with coupons!) and some items were quite reasonable even without the coupons.
What I am sharing is a collective haul from a couple of different Michaels stores spanning a distance of 4 towns!  I have not tried any of this product yet, and I will be sure to share with you what I think of it when I do.  Most of the reviews (all actually) that I have seen have been good, so I was pretty confident making my purchases  There are many more items in the line, including water colours, pens journals, rub-ons and more.  I will probably get some more things down the line, but I did manage to  get most of what I wanted.

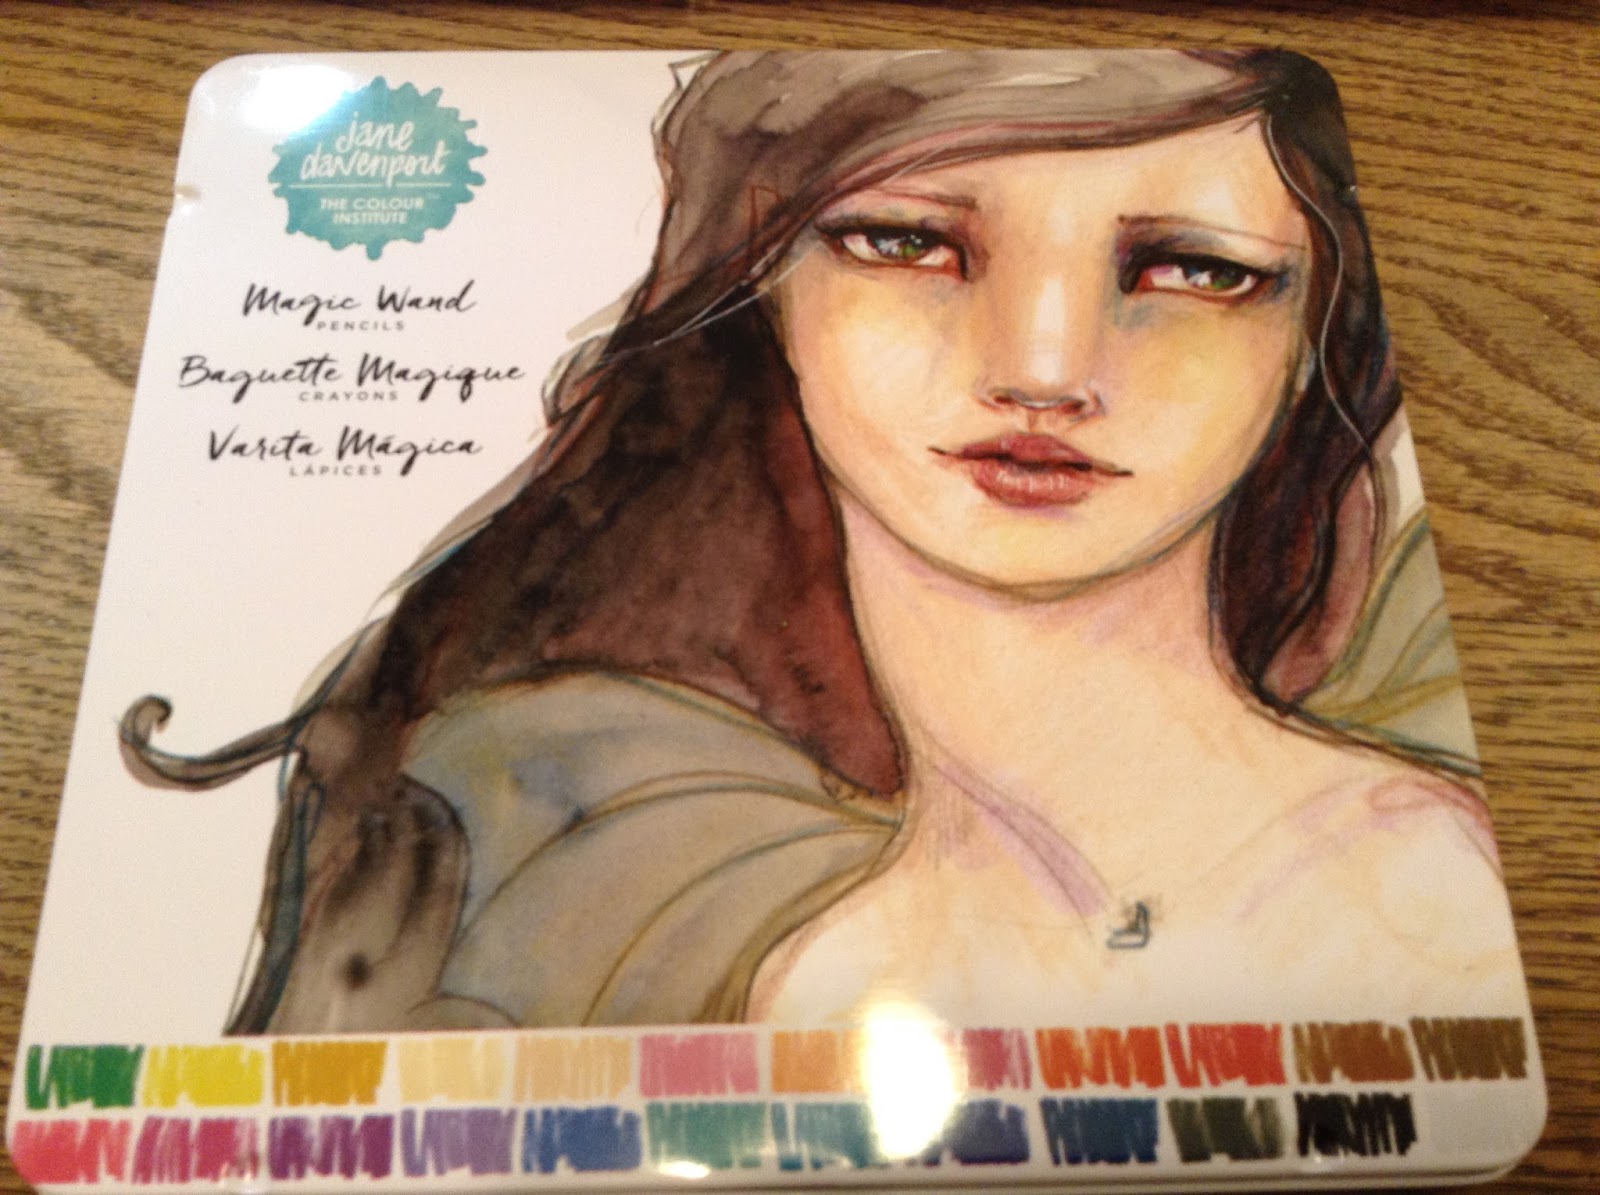
I am excited to try these pencils, they supposedly play very well with paint and other media

I actually have a lot of Gesso and matte and other mediums that I use in my  painting, but I thought I would try these anyways.  They are a handy size to keep with my crafting supplies

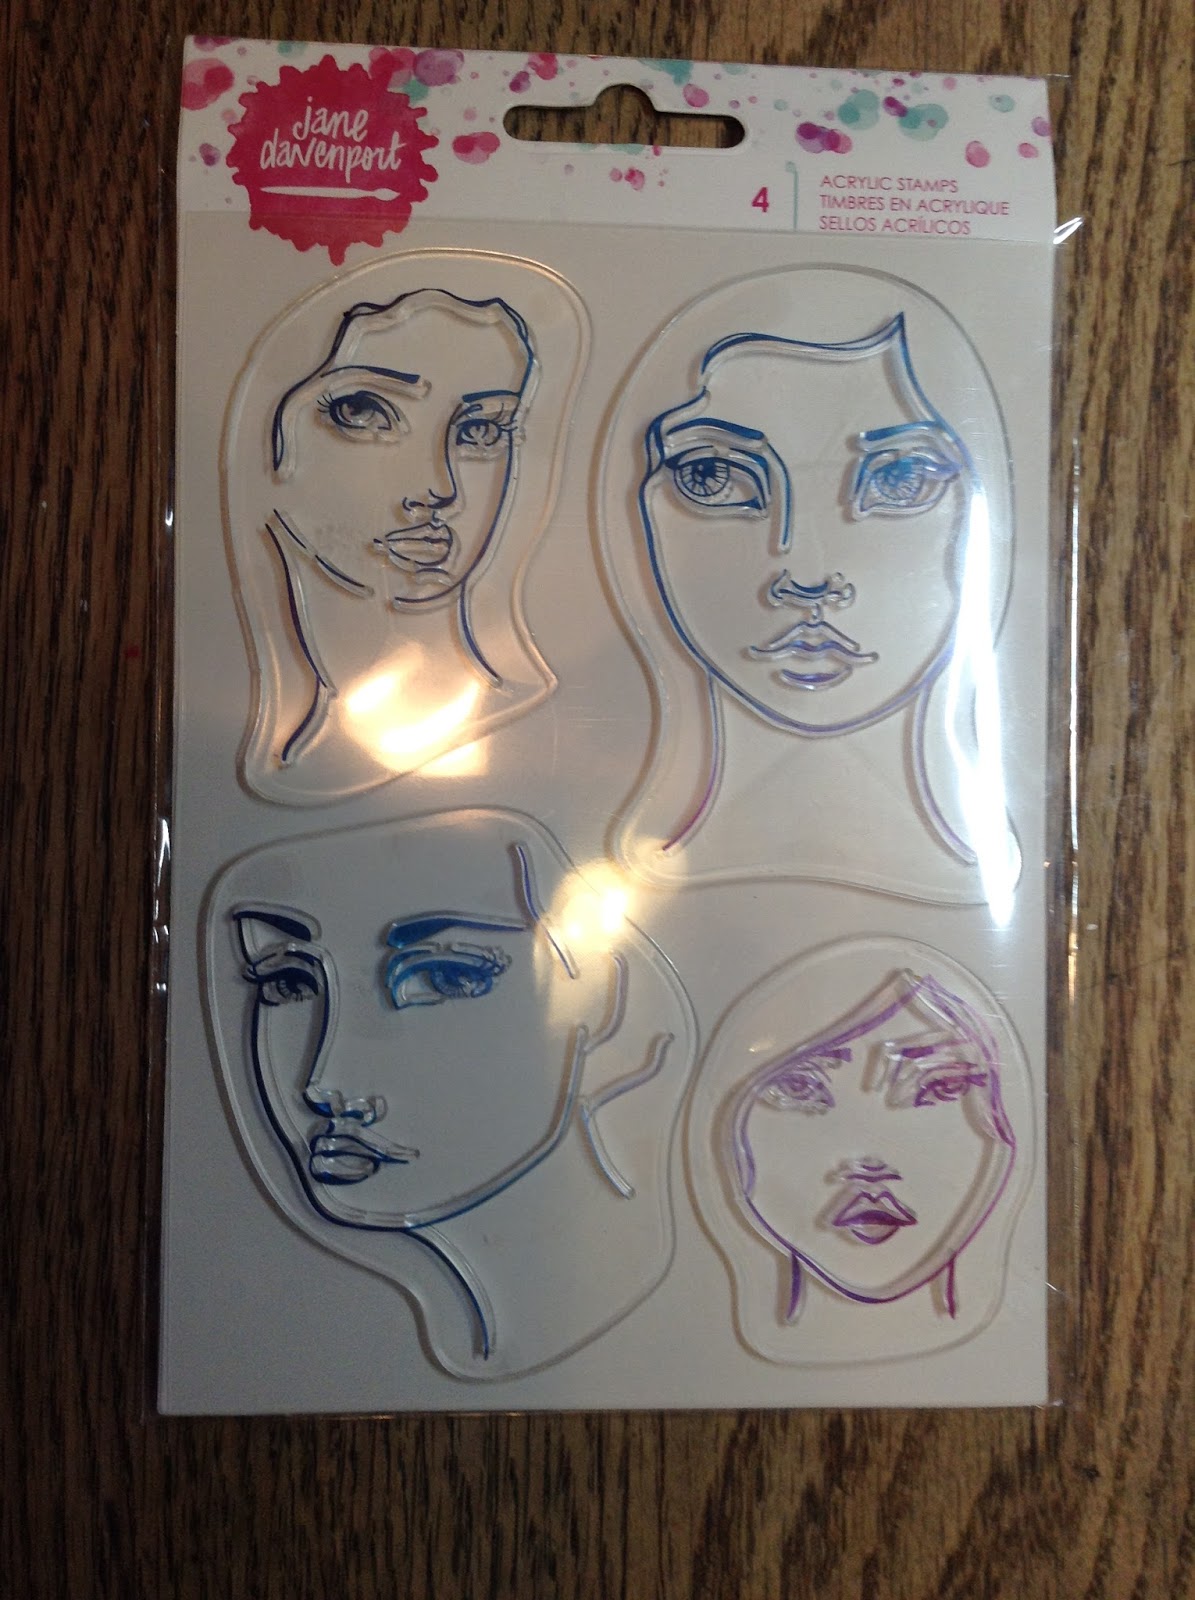
All these stamps were a very good price point, in my opinion.  They were $8, or maybe even $8.99 (Cdn), so probably even less in the US.

This stamp set is going to be so fun to play with, creating different faces!


I am also looking forward to giving these a try, especially the white, I am always on the hunt for good white pens for mixed media.

How cool are these!

Funny story, my friend Lynn was with me for the majority of my Jane Davenport hunt.  We were both looking for the stencils but couldn't find them at either store.  Lo and behold, when I got home I discoed that the stencils were in with the paints.  It did say that on the packaging, but we missed it in our excitement.


I am looking forward to giving my new stash some creative love.  However, I am also busy painting as I will be displaying my art at the Ajax Town hall soon, and I am hoping to have some fresh new works, which I will share.  So, now that I have all my Jane Davenport goodies, before they sold out, I will reluctantly have to put them aside for a little while.  But next month, I'm sure I will have someting to share, so make sure to check back.  It would be great to hear what any of you, who have the new products, think of them.

Thanks so much for stopping by, here's to a wonderful creative year together! xo

Here are slinks to some of the different groups and communities I have been enjoying, I hope you can check them out.
One Little Tag Craft Challenge , Facethescraps , Creating and Sharing Mixed Media Art ,All Things Mixed Media Art! , Krafters Kommunity , Card Making Haven

Friday, 30 December 2016

A few more Christmas Cards - Using one basic layout


Hello my friends.  As I mentioned in yesterdays post, I have created a few more cards using the same basic layout as the card I did for my friend Margaret.  Each one is a little different and unique, but a lot of the work could be done at the same time, assembly line style.  All the stock could be cut at the same time, all the pieces cold be die cut at the same time and the assembly could be done at the same time.  What I like about doing some mass producing of cards is that it is a definite time saver .  What I'm not crazy about when it comes to mass producing cards, is that they are all the same and often one layer and fairly simple...sometimes.  Don't get me wrong.  There are some very beautiful and elegant, yet simple, one or two layer cards that are very effective (I should make a point of trying to make some of them, actually!).  If you have a lot of cards or invitations too make, that is certainly a wise way to go.  Bottom line, they are all still hand-made with love.  I like to go somewhere in the middle.  Using common elements is much more time efficient, but changing up the patterned paper, or colour of stock, the stamped images or the arrangement of the elements is one way to keep each card unique and personal.  Sometimes, the creation of one card will inspire you to create more because you like how it turned out.  This was the case here.  I liked the way Margaret's card turned out, but that card was very personal too her and her husband because of the dogs., so I made some changes.
These cards definitely still took  quire a bit longer than a single layer mass produced card, as each piece was distressed and inked and die cut or trimmed.  But they were quicker than designing four cards from scratch.  Often, I find that the designing of a card takes the most time.  Another good reason to recycle one that you like.  You can take one basic layout and keep it as simple, or make it as complex, as you like.


I don't typically follow a card sketch, but there are some great ones on-line that can get you going when you are stumped.  One that I have used is Mojo Monday.  They have loads of card sketches and do contests and challenges as well.  So if you find yourself stuck when trying to create a card, go back to some of your favourite cards that you have already created for some inspiration, or if you want to try something totally new, try finding a sketch on-line.
This is an example of a Mojo Monday card sketch, follow the link above to have a look at more sketches

Well, I hope this will be helpful when you find yourself in a creative card rut, which happens to most card makers at some point, and are looking for that little push.
Thank you so much for stopping by.  I am looking forward to sharing lots of cards and art and posts with you in 2017.  Please let me know in the comments if there is anything  you would like to see on my blog and I will do my best to make it happen.
Have an awesome and artful day! xo

Thursday, 29 December 2016

Merry Christmas Card


Hello my friends!  Sorry that I have been absent for a bit, but this season is such a busy time.  I hope you are all having a wonderful holiday filled with family and friends and lots of love.   My sister is requesting more Christmas cards, she is not ready to give up the season.  So for the next little while I am going to continue with the Christmas cards.  
This is one that I made using a similar layout to the last card that I posted.  I wasn't going to post this card, but Kerry (my sister) called me and said she was waiting for me to do a new post!  Some of you may have noticed me mention, Kerry.  She lives 3000 miles away on the other side of the country and my blog is one way that I can share my cards and art with her.  So, I decided to post this card, after all.  I also thought it might be helpful to show how you can take the same basic layout and switch it up a bit to get a different card.  I have done another card based on the same format that I will share tomorrow (it just needs a few final touches).

Thank you so much for stopping by!  Again, hoping everyone has a wonderful holiday and all the best for a healthy, safe , happy, prosperous and definitely a creative and art filled New Year!!!  xo

Monday, 19 December 2016

Merry Christmas Card - with some reverse (mirror) stamping


Hello my friends!  A very quick post today.  I have to get to bed, i have to be up early to go to a taping of Cityline!  I am going with my friend Margaret.  I made this Christmas card for her.  I saw this stamp a week or so ago and thought it was perfect for Margaret and her husband as they have 2 Boston Terriers, so I grabbed it!  I hadn't had a chance to make this card, but I wanted to get it done.  I think she would have liked another of my handmade cards, but I thought this would be a lot more personal card.  Besides,  Zoey and Bogart were the reason I bought the stamp!


The interesting thing about this card is that in order to do both dogs, I had to do some reverse, or maybe I should be calling it mirror, stamping.  I did some experimenting.  It's not perfect, but I don't think there is a perfect solution.  But I think it turned out pretty good.  I will tell you that I used my Gelli plate!  I will do a more in-depth look at this technique if anyone is interested.  But I must sign off for now!
Thank you so much for stopping by!  Let me know if you would like to see a post on mirror stamping.  Hopefully I will have some photos of Cityline to share.
Have an awesome day!

No automatic alt text available.
Bogart and Zoey

Friday, 16 December 2016

New Christmas Card - Lawn Fawn Sprinkled with Joy


Hello my friends!  Today i have a new card creation for you.  I really enjoyed building my little scene with the Stampendous Truck and the Tim Holtz die, so I thought I would do another one.  This card was created using the Lawn Fawn "Sprinkled with Joy" stamp and die set, which I just think is sooo fin!  There is and Add-on die available for this set, that turns the oven into an interactive feature.  I got this die and have used it here.  You certainly don't have to get this additional die, but it is fun!  I also used a Sizzix stamp and die set along with the Lawn Fawn set.


I stamped and cut all my pieces using my DIY stamp positioner, which comes in really handy with stamp and die sets. especially if you want to make multiples.  I did, since I had everything out and just put them in (uncoloured) with the set so that the next time I want to make a card, they will be ready to go.


I cut the cookies and cookie cough out of kraft card, and the cookie tray and oven handle out of silver foil board.  I cut the tea towel out of some patterned paper and trimmed a little mat out of some patterned paper as well.  I trimmed out some velum to use for the oven window.
I decided to make this a larger card, so my finished size will be 8.5 x 5.5.  This way I could get a lot of elements in.  Now to build my little scene! I took advantage of the 70% off deal at Michaels and got a patterned paper pad among other things, lol, maybe a little haul post is in order!) and decided to use some of it for the floor and the wallpaper..


 I trimmed some planks out of the wood grain paper and edged them with vintage photo distress ink before adhering them.  I used my Spectrum Noir markers to colour in the stove and all of the other elements. I used patternedcard from another card pack I got at Michaels for the counter.  I trimmed it out and shaded it with the markers.  Once I coloured all my elements. I assembled my card.  I created the cupboards by trimming  them out from some scraps.  I edged them and drew in some handles.

I used a sentiment from a stamp and die set that I have had for ages and never used.  It seemed perfect for this card/

Once my card was all assembled. I mounted it to some embossed card that I had on hand.


Thi card didn't turn out anything like I first envisioned it.  At first the cupboards were going to be white and the stove was going to look like stainless steel.  But once  I started doing the floor and adding the wallpaper, I started to get a retro feel.  I wanted to do the stove like the old "avocado green" stoves from my childhood.  Remember those?

This card took me a while to make, nut itis a fun and interactive.  I hope you enjoyed it!
Thank you so much for stopping by!    Wishing you an awesome and artful day!